To replace nonstick pans safely, you do two things: confirm the coating is actually finished rather than merely scratched, then move that one job to a pan material that suits how you cook. The whole process takes about an hour for a single skillet, most of it cleaning and seasoning rather than shopping.
Most of the anxiety around this topic is misplaced. A pan with a few hairline marks from a wooden spoon is not a health emergency, and a scratched pan is not a reason to bin a whole set. The pans worth replacing are the ones that flake, that no longer release food, that sit unevenly on the counter, or that came with the older PFAS-era coating nobody should be cooking on today.
Here is the order I would work in. Find out what the coating actually is. Test the pan for the five signs that it is finished. Pick a replacement based on the meals you actually make. Retire the old one through a route that does not put coated metal in your curbside bin. Then break in the new pan before you retire anything else, because a carbon steel skillet that was never seasoned is how most people decide they hate cooking.
Table of Contents
- What You Need
- Step-by-Step: How to Replace Nonstick Pans Safely
- 1. Identify What the Pan Is Coated With
- 2. Decide Whether the Existing Pan Must Be Replaced
- 3. Choose a Replacement Based on How You Cook
- 4. Retire the Old Pan Without Creating Fumes or Waste
- 5. Learn the New Pan Before Replacing Your Cookware
- Common Mistakes
- Frequently Asked Questions
- What are the signs a nonstick pan is finished?
- How often should you replace a nonstick pan?
- Is a scratched nonstick pan still safe to use?
- What should I replace nonstick pans with?
- Can you put old nonstick pans in the recycling bin?
- How long does it take to season a new cast iron or carbon steel pan?
- Conclusion
What You Need
You need very little to start, and none of it is expensive. The point of gathering this first is that you will not have to rush the decision once a pan starts sticking.
- The pan itself and somewhere to set it. A folded towel on the counter is enough. You want a flat surface to check warping on.
- Its documentation. The box, the manual, the warranty card, or the product listing you bought it from. Coating language lives there.
- A bright light. A window or a lamp. Peeling and discoloration are hard to judge under dim kitchen lighting.
- Wooden or silicone utensils. For the wear test and for cooking in the pan while you decide.
- Paper towels, mild dish soap, and a stiffer brush for stuck food. Not steel wool on a coated surface.
- Cookware oil or a high-smoke-point oil for seasoning the replacement, plus an oven or stovetop you can heat to about 450°F for a full oven cure if you are starting cast iron or carbon steel.
- One replacement pan, not a set. A single 10 or 12 inch stainless skillet, or a carbon steel skillet if eggs are your problem, covers most of what people panic-replace.
Ventilation matters more during this process than most guides admit, but only in one specific situation: if you heat a badly damaged pan hard enough to make it smoke, turn on a range hood or open a window first. Cool pans do not off-gas. A window is cheap insurance for the ten minutes you are cooking in a suspect pan while you shop for its replacement.
Step-by-Step: How to Replace Nonstick Pans Safely
1. Identify What the Pan Is Coated With
Start with the label, because the words on the box tell you more than the pan ever will. Almost every nonstick skillet in American kitchens is one of three things: a PTFE coating sold under the Teflon trademark, a ceramic-based coating that contains no PTFE, or a marketing claim that the coating is PTFE-free or PFAS-free while never quite saying what it is made of.
PTFE is the polymer that gives nonstick its slip. Applied properly, it is chemically inert and stable well below normal cooking temperatures, which is why a scratched PTFE pan that sits in your cabinet is not an acute danger to anyone. The concern has always been heat. Once PTFE goes past roughly 570°F (300°C) it can decompose, and the fumes that come off it cause a short-lived flu-like reaction in people and can be fatal to pet birds. That is the number to remember, because it is also the temperature at which an empty pan left on a burner can spiral within a couple of minutes.
PFOA, a chemical used in manufacturing PTFE for decades, was phased out of US production around 2015. Pans made before that era are the ones with the least clear history. If the documentation says nothing at all, treat an old, unbranded-looking, imported pan as pre-2013 and replace it on age alone if it is also showing wear.
Ceramic coatings are a different chemistry, usually a sol-gel ceramic surface with no PTFE in it. The marketing term PFAS-free has been widely used to describe them. The practical caveats: they are not as scratch-resistant as PTFE, and the strongest ones are still not a lifetime pan.
2. Decide Whether the Existing Pan Must Be Replaced
Replace a nonstick pan when any one of these five things is true. Any one alone is enough, and you do not need all five.
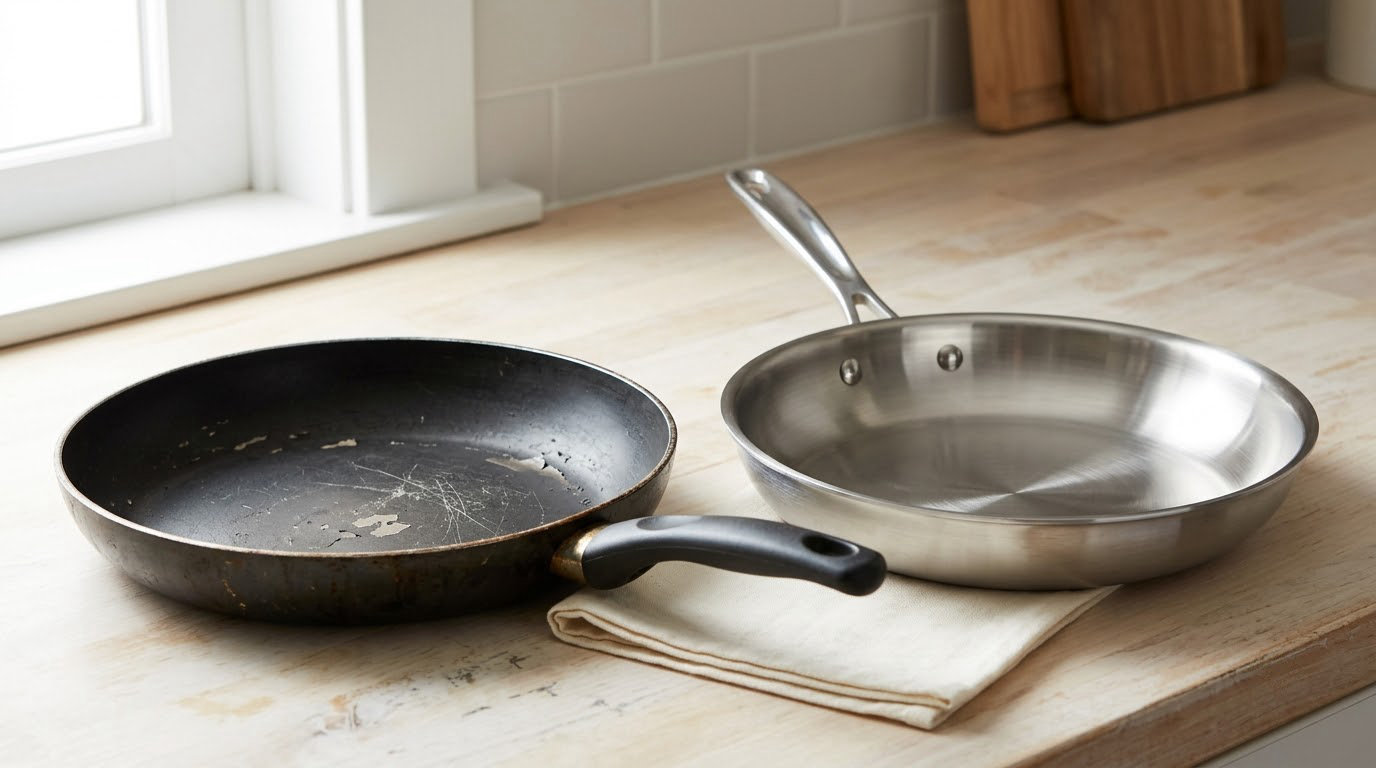
- Coating that peels, flakes, or lifts in sheets. Flaking is the single clearest signal, because loose coating is the only state where the pan is losing material you could ingest. Ignore everything else and replace it.
- Deep gouges that reach the metal. A scratch you can feel with a fingernail that catches and does not slide off means the coating is gone down to the base. Hairline marks that only you can see under raking light do not count.
- Discoloration that will not scrub off. Uneven brown, rust-colored spotting, or a grey cloudy film across the cooking surface means the coating has oxidized. Heat degradation and empty-pan burning both leave this behind.
- Warping. Set the pan on a flat counter and touch the rim. A rock or a wobble means the pan base no longer sits flat, so it cooks unevenly, it can be a hot spot, and no amount of re-seasoning fixes the geometry.
- A handle that is loose, cracked, or cool to hold. Rivets that move, a rivet head spinning, or a hollow handle that gets hot while the food simmers is a burn risk, not a coating issue. That pan is finished regardless of how the surface looks.
Now the calibration, because this is the part most people get wrong in both directions. A pan with fine surface scratches, a few dull spots, and slightly reduced release is still a working pan. Once PTFE is applied to a pan it does not dissolve into your food, and the amount that could ever come off an intact-but-scratched surface is trivially small. A r/Cooking regular put it more bluntly than any brand ever has: a superficial scratch is not damage, and the pan will still function essentially as it did on day one.
Two more reasons to keep what you have. If a pan was made after 2015, carries clear coating documentation, and has no flaking, you are replacing it out of preference rather than necessity, and that is a perfectly good reason. And if the pan is one you genuinely love cooking on, hold onto it. Swapping your whole kitchen on a schedule nobody asked for is how people end up with a garage full of pans they do not touch.
3. Choose a Replacement Based on How You Cook
Pick the material that matches the two or three meals you make most, not the one that sounds healthiest. A pan you use is worth more than a pan you admire.
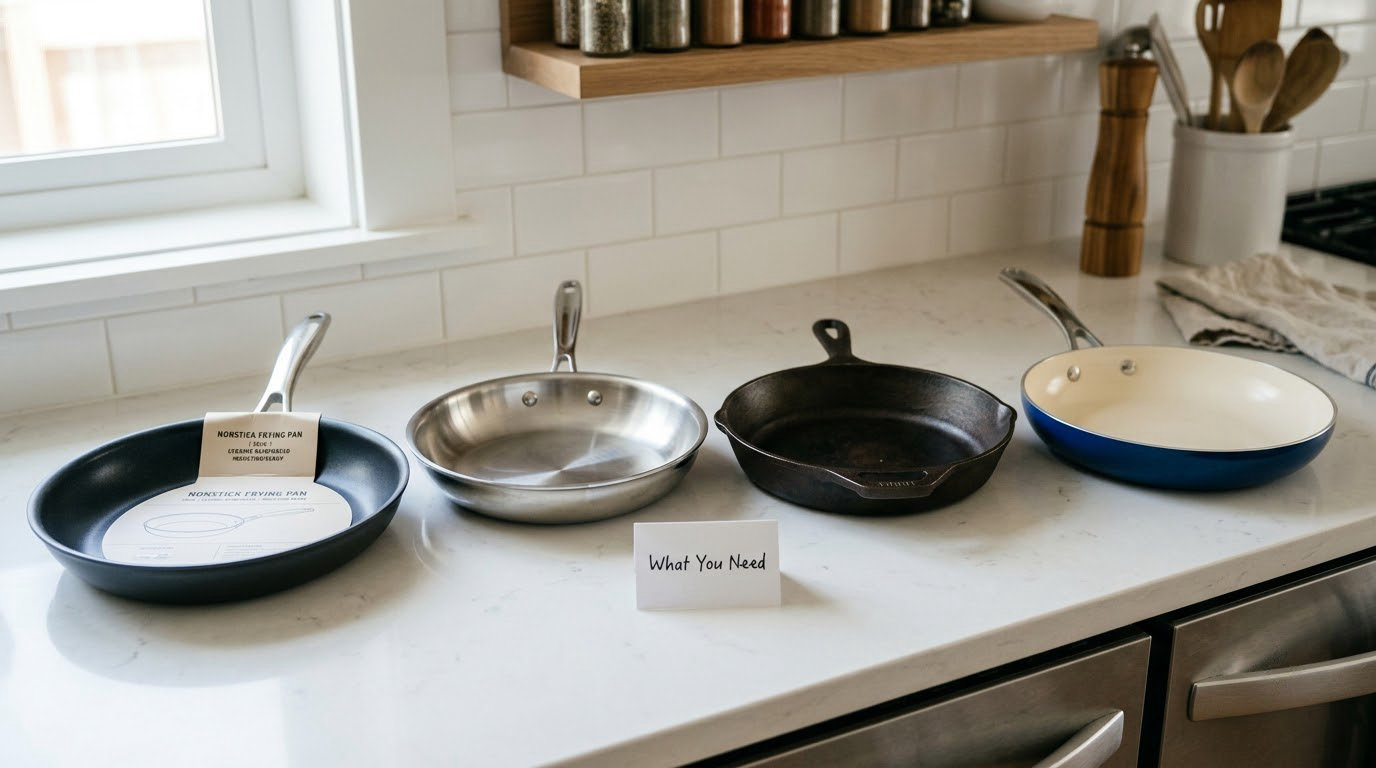
- Stainless steel: choose this if you already know how to cook without sticking, want one pan for everything including acidic sauces and searing, and are willing to use a little more oil and heat for a short time.
- Cast iron: choose this if your most-cooked dish is something that goes in the oven and comes out browned, or you want a pan that genuinely lasts a generation. Skip it for a low-and-slow omelette.
- Carbon steel: choose this if your problem is specifically eggs, fish, or delicate things, and you are willing to spend twenty minutes seasoning it. It is lighter than cast iron, heats faster, and takes technique faster too.
- A reputable ceramic-coated pan: choose this if you are not ready to learn heat control at all and want a gentler alternative to PTFE. Expect a shorter life than steel and treat it as a deliberate stopgap, not a final answer.
Realistic lifespans vary with how hard you treat a pan, so treat these as planning ranges rather than warranties.
| Material | Realistic lifespan | Replace it when | Upfront effort |
|---|---|---|---|
| PTFE nonstick | About 2 to 5 years with normal use | Coating flakes, or release fails and you start cooking hotter to compensate | None |
| Ceramic-coated | Often 1 to 3 years in real kitchens | Surface roughens, scratches through, or food begins to grip | None |
| Stainless steel | Decades | Multi-layer construction delaminates, or the base warps badly | Ten minutes of practice |
| Carbon steel | Decades with occasional re-seasoning | Rust pitting that scrubbing will not remove | Two or three seasoning rounds |
| Cast iron | Generations | Cracked, or thin enough that it warps badly under heat | An oven cure and a stovetop seasoning |
Budget is not a reason to skip this. A thrift store stainless skillet that has been someone’s for thirty years is usually a better buy than a new cheap coated pan, and the same is true of a yard-sale carbon steel pan with a surface you can re-season in one afternoon. Cast iron that has been stored long enough to go orange-red on the outside is a project, not a loss.
4. Retire the Old Pan Without Creating Fumes or Waste
Do not put a coated pan in your curbside recycling bin. Mixed-material items with a non-metal coating are routinely rejected by sorting equipment, and a rejected pan in the recycling stream can contaminate a load of good material. That rule holds whether the coating is PTFE or ceramic.
Work through these routes in order, and stop at the first one that fits your situation. Manufacturer take-back is first: a few cookware brands run mail-in or in-store recycling programs, and some retailers accept returns of old cookware. Check the brand’s own site rather than assuming. Scrap metal drop-off is second, and many municipal recycling centers and scrap yards accept bare aluminum or stainless steel, though many will not accept anything with a coating still attached. Hardware store and manufacturer drop-off points are third and are the most under-used option in this whole article. Donation is fourth, and only for an intact pan with no peeling, which is narrower than it sounds. Ordinary trash is the last resort, and for a flaking pan in a community with no take-back program, that is the correct and honest answer.
Before any of that, let the pan cool completely on a cold burner with the range hood running if you cooked in it while damaged. Do not wash a hot pan under cold water, and do not try to scrape a pan that is still warm, because the coating softens. Municipal rules change, so check your hauler’s accepted-items list for 2026 before you drive anywhere.
5. Learn the New Pan Before Replacing Your Cookware
This is the step that decides whether the transition sticks, and it is the step almost every guide leaves out. Season the new carbon steel or cast iron pan properly and the learning curve shrinks to about a week.
The seasoning routine, in order. Scrub the pan with hot water and a stiff brush, then dry it on a burner over medium heat until it is completely warm, roughly two minutes. Pour in about a teaspoon of cookware oil and spread it over the entire surface, handles and rim included, using a paper towel until the pan looks dry rather than greasy. Set it on a medium burner for two to three minutes until the oil just begins to smoke, then move it off the heat and let it cool completely. Repeat the oil and heat step two more times. For cast iron, finish with 30 minutes at 450°F in the oven; carbon steel does not need the oven, but three stovetop rounds will do it. Cool on the burner with the hood running, then wipe it with a thin layer of oil and let it cure overnight before the first real meal.
After that, three habits do most of the work. Preheat with oil, not empty: put the oil in first, then bring it to temperature, and lay food on it. Use wooden, silicone, or metal-but-blunt utensils freely on a seasoned pan, because a little scratch on cast iron does not matter the way it does on a coating. And for stainless steel specifically, use the heat deliberately, medium to high, rather than constantly moderate, so the food sears instead of steams and releases on its own.
The egg question deserves its own paragraph because it comes up constantly. Eggs stick because proteins weld to bare or unseasoned iron at a temperature below the point where the pan is fully nonstick. Fix it with three things: a pan that has been seasoned several times, butter or oil in the pan before the egg goes in, and a lower heat than you think you need. For an omelette, heat the pan, add fat, let the fat foam, add the egg, and pull it while the top is still glossy. A little movement of the pan as the egg sets also helps release it.
Do all of this with the pan you are replacing and keep the rest. One pan at a time is how most households actually get through this without spending money they did not plan on, and it lets you learn on a single piece before committing to a whole kitchen.
Common Mistakes
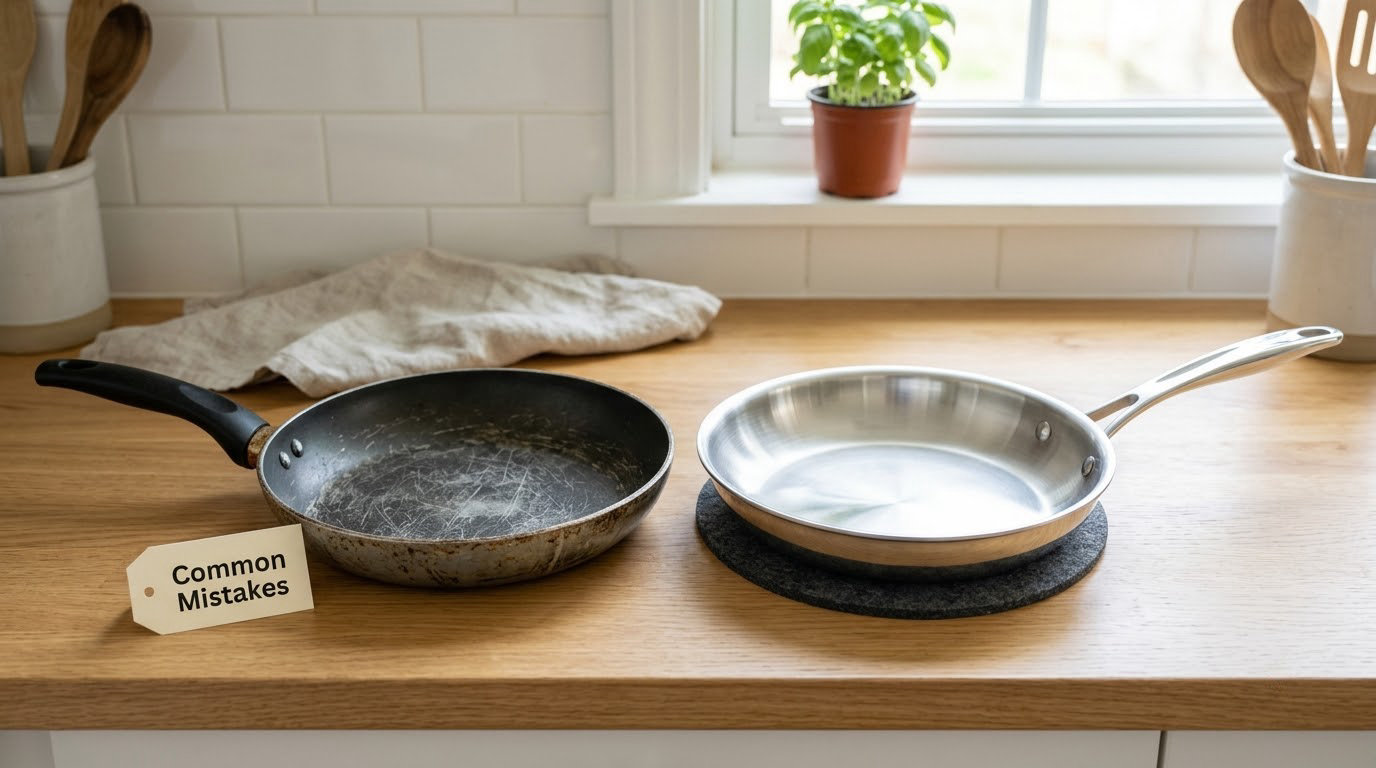
Treating all nonstick as one thing. A 2018 PTFE pan and a 2004 PFAS-era pan from the same brand are not the same object with the same history. Check the documentation before assuming, and weight age more heavily than a scratch.
Buying on a safety claim instead of a specification. PFAS-free is a marketing term used on coatings that may or may not contain PTFE. Look for a named material and a manufacturer, and treat vague claims as a reason to keep looking.
Ignoring the handle because the surface looks fine. A loose rivet or a hollow handle that heats up is the most under-diagnosed reason people get hurt on a pan that otherwise seems fine.
Retiring a pan for a shallow scratch. This is the expensive mistake. You replace a working pan, buy a new one, and end up with two coated pans instead of one, plus the guilt. Deep gouges and flaking justify replacement. Hairline marks do not.
Overheating the replacement in week one. Stainless and carbon steel that is left on a burner empty or blasted on high before its oil is in the pan will either seize with food or lose its seasoning. Preheat with oil, every time.
Thermal shock. A hot pan into cold water, or a chilled pan onto a hot burner, is what warps pans and what makes a seasoned layer flake. Let the metal come back to room temperature between cooking and washing.
Putting coated cookware in the recycling bin. It is the most common disposal mistake and the easiest one to avoid. Bare metal yes, coated metal no, unless your local program specifically accepts it.
Replacing the whole kitchen in one weekend. You lose every pan you know how to cook on, all at once, and the first stuck egg convinces you the new setup is worse. Swap one piece at a time and keep the rest until the new one proves itself.
Frequently Asked Questions
What are the signs a nonstick pan is finished?
Five signs mean the pan is done: coating that peels or flakes, deep scratches that reach the metal, discoloration that will not scrub off, a warped base that rocks on a flat counter, and a handle that is loose or heats up. Any one of these justifies replacement. Fine hairline marks from wooden utensils do not.
How often should you replace a nonstick pan?
Most heavily used PTFE nonstick skillets last about two to five years before the coating stops releasing properly, and ceramic-coated pans often give out sooner, in one to three years. That range assumes daily use and careful handling. A pan used twice a week can comfortably go longer, and age alone is not a reason to throw out a well-made pan with no wear signs.
Is a scratched nonstick pan still safe to use?
A shallow scratch that does not catch your fingernail usually is not a safety problem. Once applied, the coating is chemically stable and does not dissolve into food, and the amount that could come off an intact but marked surface is very small. Replace the pan if the coating is flaking, deeply gouged, or discolored, not because you can see a line on the surface.
What should I replace nonstick pans with?
Stainless steel for all-around cooking and acidic foods, cast iron for oven dishes and long-term durability, carbon steel if eggs and fish are your sticking problem, and a reputable ceramic-coated pan if you want a gentler surface but are not ready to learn heat control. Match the material to the two or three meals you cook most, and replace one pan at a time.
Can you put old nonstick pans in the recycling bin?
No. Curbside programs generally reject cookware with a non-metal coating, and a rejected item can contaminate a load of recyclable material. Check for a manufacturer take-back or mail-in program first, then look for a local scrap metal drop-off that takes bare aluminum or stainless steel. A pan with a coating still attached usually goes to ordinary trash.
How long does it take to season a new cast iron or carbon steel pan?
Two or three stovetop rounds of oil and heat, about twenty minutes per round, is enough for carbon steel. Cast iron benefits from finishing with 30 minutes at 450°F in the oven, then an overnight cure before the first real meal. You can cook on it sooner, but giving it the full cure means fewer stuck eggs during the first week.
Conclusion
Pull the pan out of the cabinet and look at it before you buy anything. Check the coating against the five signs, read whatever documentation came with it, and if the only thing wrong is a few surface marks, cook with it. If it is flaking, warped, or losing its grip, buy one replacement that matches the meals you make most, season it properly, and send the old one to take-back or scrap metal rather than the recycling bin. One pan, one careful swap, and the rest of your kitchen can wait until the new one earns its place.