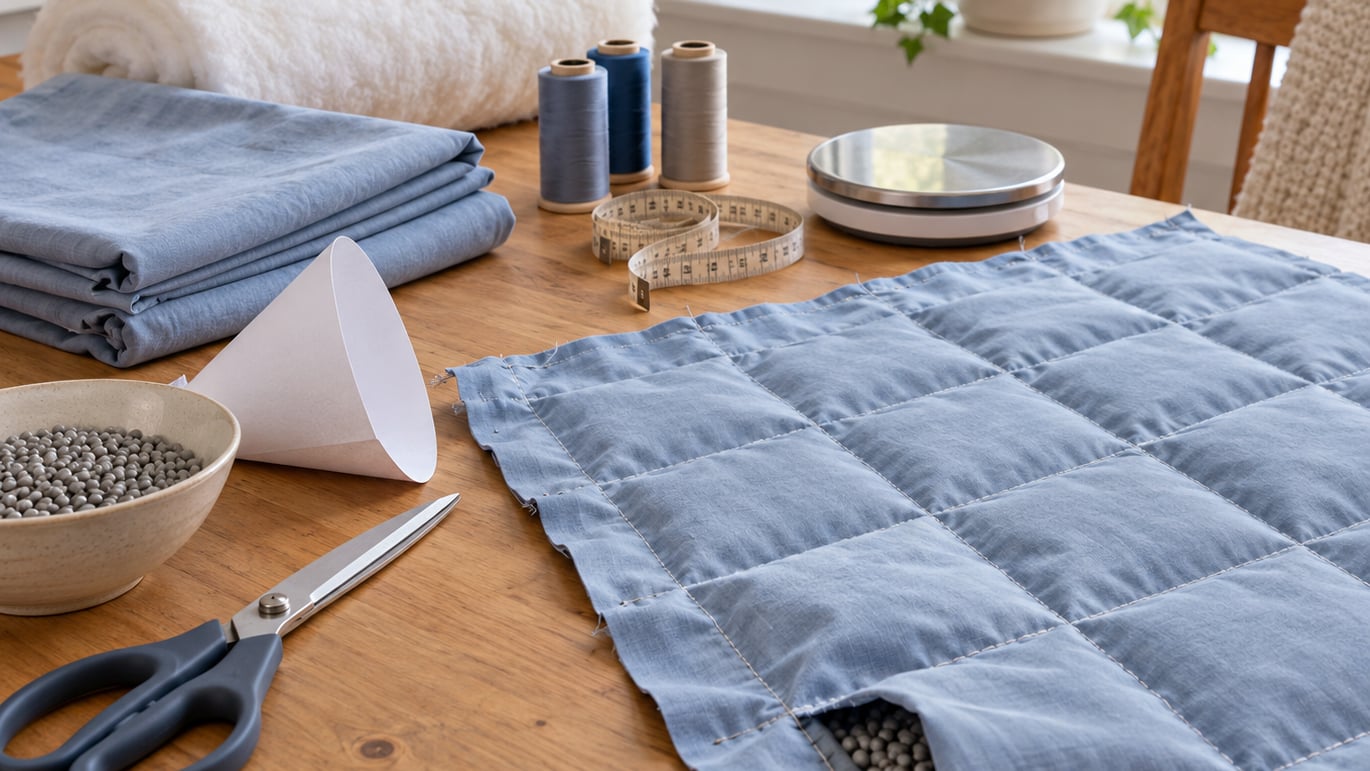
A weighted blanket gives steady, even pressure across a child’s body, and making one at home is a weekend sewing project: cut two fabric layers, sew them into a grid of small pockets, divide the total weight evenly, and seal everything shut. For a child, the weight itself is not a DIY decision. Talk with a pediatrician or occupational therapist first, then build the blanket to the number they give you.
I’ve talked with plenty of parents who wanted control over size, fabric softness, and how much weight their kid actually gets. That control is the real reason people make their own, and it works well once you know the few measurements that matter.
Below is the process, in order, including the checks most guides skip.
Table of Contents
- What You Need
- How to Make a Weighted Blanket: Step-by-Step
- Choose the Fabric and Blanket Size
- Select and Distribute the Weight
- Cut the Layers and Make the Weight Pockets
- Sew and Finish the Weighted Blanket
- Check the Blanket Before Use
- Common Mistakes
- Frequently Asked Questions
- What fabric is best for a DIY weighted blanket?
- How much weight should a child’s weighted blanket have?
- Can I make a weighted blanket without a sewing machine?
- How do I keep the weight from shifting or bunching?
- Is a DIY weighted blanket safe for a child with autism?
- How should I wash and care for a weighted blanket?
- Conclusion
What You Need
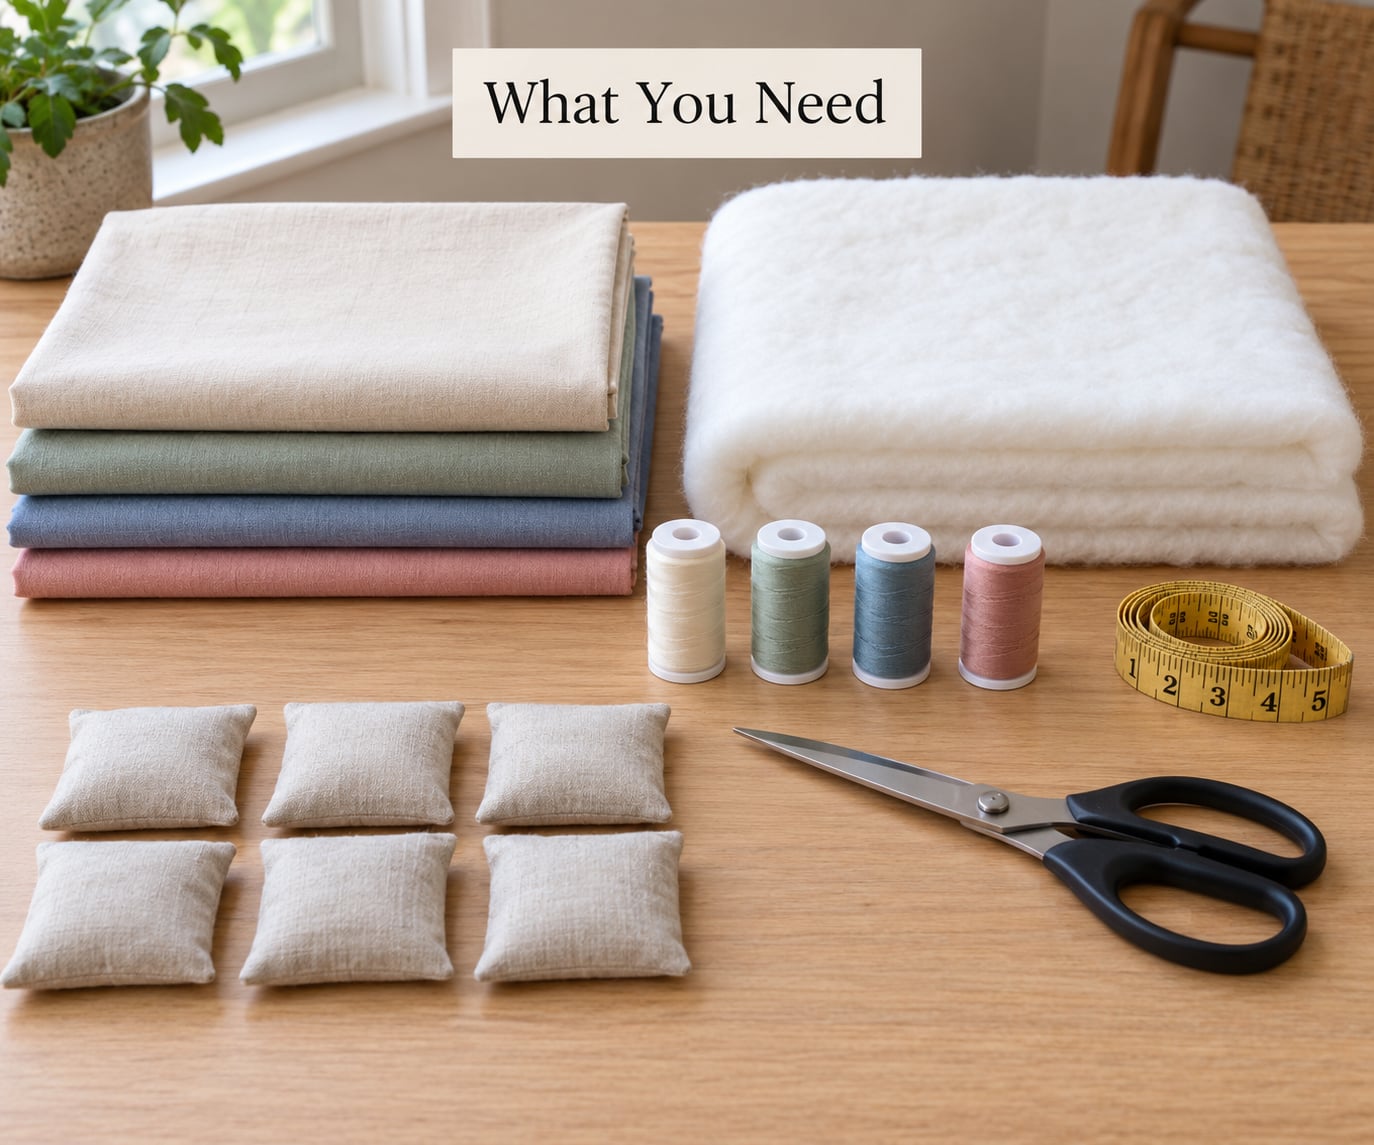
You do not need specialty sewing supplies. Everything on this list is available at a fabric store or a general craft shop.
- Outer fabric — about 1.5 times your finished blanket size, so you have seam allowance to spare. Cotton or cotton-blend is the safest default.
- Lining fabric — the same yardage. Lining is lighter and cheaper, and it keeps the weight from poking through the top.
- Quilt batting — one layer if your child runs cool, none if they run warm. Batting adds insulation and volume between the pockets.
- Washable poly pellets or glass beads — buy the weight your clinician recommends, plus roughly 10 percent extra for spills and miscounts.
- Heavy-duty or denim needle — for your machine. This one matters more than people expect.
- Thread — heavy cotton or polyester thread, and a doubled bobbin.
- Measuring tape, fabric marker or tailor’s chalk, and scissors or a rotary cutter
- Kitchen scale — a cheap one is fine. You will use it for every pocket.
- Paper funnel or a 1.5 inch PVC pipe section — a filling funnel, reusable across projects.
- Optional: binding tape, safety pins, and a washable cover fabric if you want the blanket itself to stay out of the wash.
On materials, comfort and durability pull in the same direction here. Dense, tightly woven fabric holds weight and resists tearing better than a loose weave, and breathable cotton keeps a child from overheating under it, which is the most common reason families stop using a homemade blanket after a few weeks.
How to Make a Weighted Blanket: Step-by-Step
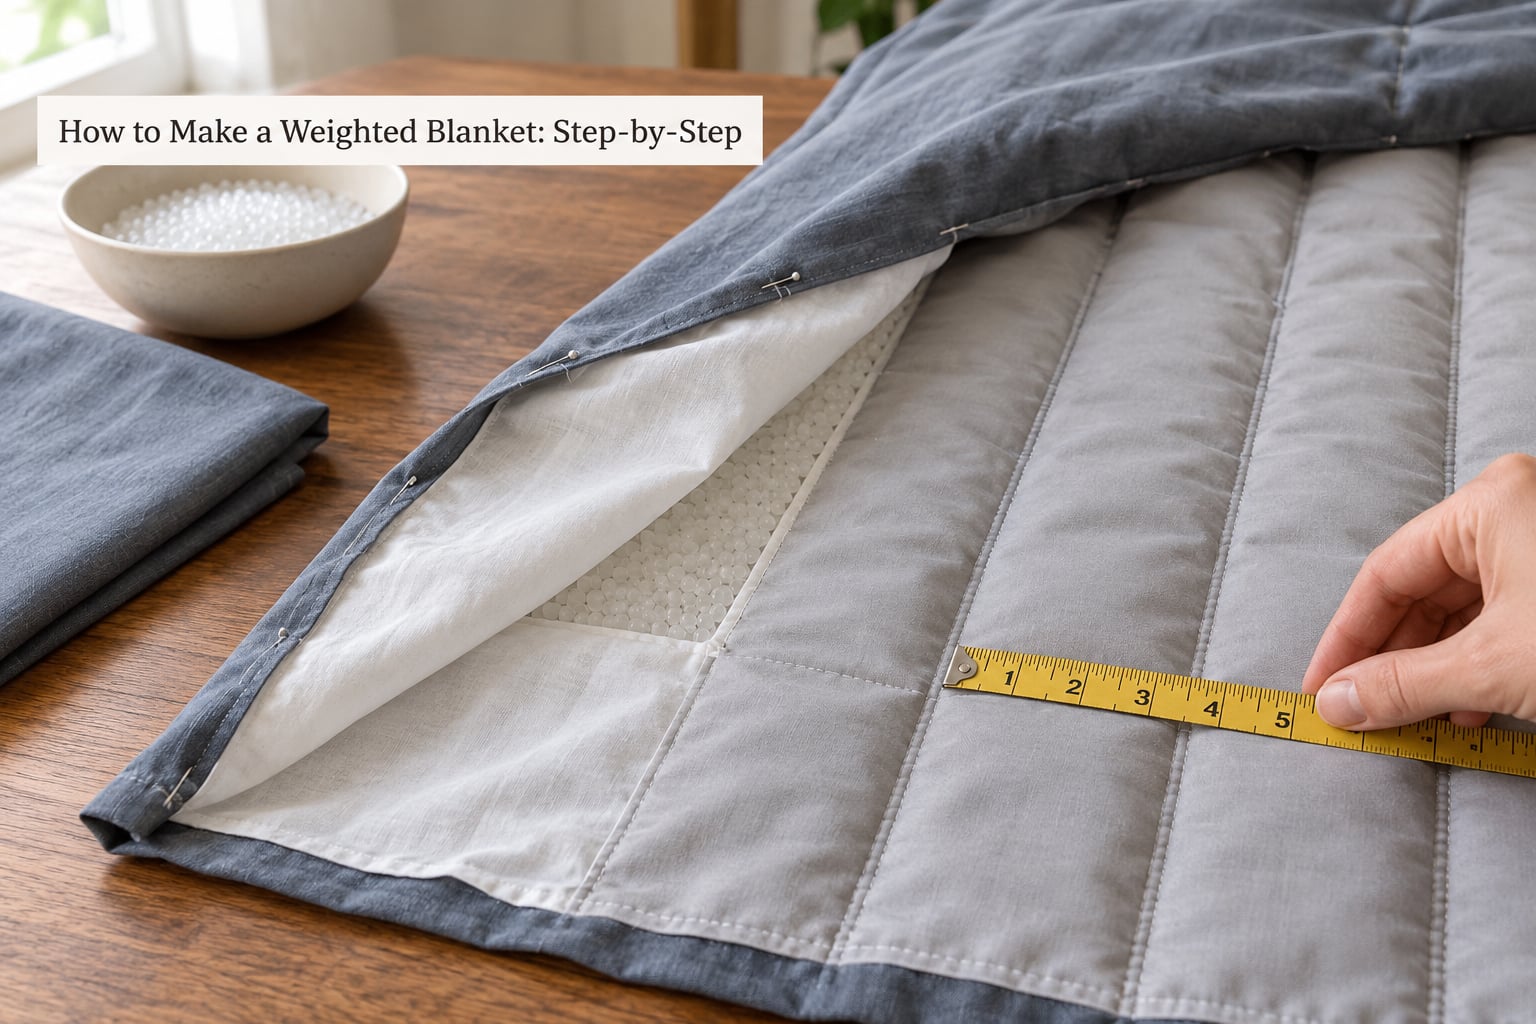
The build comes down to four jobs: cut, channel, fill, seal. Most of the time goes into the channel stitching, so set aside an afternoon plus a second session for filling, which is slower than it sounds.
Choose the Fabric and Blanket Size
Measure your child before you cut anything, because blanket size is tied to body size rather than bed size. A blanket should cover the torso and legs with a little overhang at the feet, but it should never pin the arms at the sides or sit over the face.
For a toddler, a finished size around 36 by 48 inches works well. A school-age child usually does well with 44 by 54 inches. Keep in mind that an oversized blanket can be too heavy for the body underneath it even when the weight number is right, so size and weight have to agree.
Choose fabric your child already tolerates on skin. Cotton percale or cotton broadcloth breathes well and washes hard. Flannel is softer and warmer, which suits a child who feels cold but runs hot under a blanket. Fleece and minky feel wonderful but trap heat, and minky sheds with every wash. Skip anything with loose fibers, dangling threads, or decorative buttons and ties. A child pulls at seams, and a loose button is a choking hazard.
Select and Distribute the Weight
Do not calculate your child’s weight on your own. Ask a pediatrician or occupational therapist, describe your child’s age, size, and how they respond to deep pressure, and let them give you a number. Many clinicians work from a guideline of roughly 10 percent of body weight, with lighter recommendations for children who run hot or are just starting out, but that guideline is a starting point for a conversation, not a rule to apply on your own.
Once you have a target, work out the per-pocket amount. Divide your total weight by the number of pockets you plan to make, and round to a quarter ounce so the kitchen scale stays easy to read.
A ten pound blanket with a 7 by 7 inch grid on a 44 by 54 inch panel comes out around 28 pockets, which is roughly 5.5 ounces per pocket. Aim for pockets between 5 and 7 inches square. Small pockets spread weight more evenly, but tiny 3 inch squares are miserable to fill and sew, and makers on sewing forums consistently report more even results with the larger channel size.
Fill every pocket with the same measured amount. If you plan a few extra pounds for laundry shrinkage or a growth spurt, add that to the per-pocket figure rather than loading some pockets heavier than others.
Cut the Layers and Make the Weight Pockets
Wash and dry all your fabric first. Cotton shrinks, and a blanket that shrinks after you fill it pulls the seams open.
Cut your outer and lining panels to the same finished dimensions, adding a 5 inch allowance on every side. Lay the two panels right sides together and pin the full perimeter.
Mark your channel grid with a fabric marker before you sew anything. Work from the center of the blanket outward so any small measuring drift lands at the edges instead of in the middle, where it would make the center channels uneven. Mark vertical lines every 5 to 7 inches, then mark horizontal rows at the same spacing, leaving one wider channel at the top for a hand and one empty row near the bottom for turning.
Sew the vertical channels first. Use a half inch seam allowance and a shorter stitch length than you normally would, around 2.5 to 3 stitches per inch, backstitching at the start and end of every seam. The tight stitching is what keeps small pellets from working their way out later.
Sew and Finish the Weighted Blanket
Fill the pockets before you close the horizontal rows, because a finished grid is hard to fill without a funnel. Pour each measured amount into a paper funnel or the PVC pipe, spread it flat with your palm, and keep moving. A pocket packed tight feels heavier than its number suggests, and bunching is the single most common flaw in a homemade blanket.
Leave each pocket slightly puffy rather than packed solid. Then stitch the horizontal rows across all the channels, again with a short stitch and a backstitch at each channel crossing.
Trim the batting away from the seam allowance so it does not ride up in the seam, clip the corners, and turn the blanket right side out. Close the top opening with a double-fold hem, or add bias binding around the full edge for a cleaner finish that survives more wash cycles.
Hand-sewing works, but expect it to take far longer than a machine. A sturdy backstitch or a whipstitch with doubled thread is enough, and you must still use the shorter stitch length. If you would rather not sew the grid at all, sew a simple cover from two panels and use a removable washable weighted insert inside it. That version is harder to make and much easier to launder.
Check the Blanket Before Use
Inspect the finished blanket the same day you finish it. Hold it up and look for any opening, pinhole, or gap in the stitching. Run your hand flat across every channel and confirm the pressure feels the same from top to bottom and side to side, with no heavy spot and no empty corner.
Check the edges for anything sharp or scratchy, and make sure no thread end is long enough to snag a small hand.
For the first several nights, stay within sight or hearing and watch how your child responds. Stop using the blanket immediately if your child becomes distressed or restless, pulls at it repeatedly, holds their breath, seems short of breath, becomes floppy or unusually sleepy, or says the pressure hurts. Deep pressure should feel like a steady hug, never like being pinned down.
Do not use a weighted blanket on an infant, and be cautious with a child who cannot move freely underneath it, who has breathing or circulation problems, or who is not yet able to tell you something feels wrong. Talk to a clinician about any of those situations before you start.
Common Mistakes
Most problems trace back to one of these, and every one has a straightforward fix.
- Guessing the weight. A blanket that is too heavy can cause breathing difficulty, overheating, or panic, and one that is too light just gets pushed aside. Fix: get the number from a pediatric clinician or occupational therapist before you buy filler.
- Using too few large pockets. Big pockets let weight slide to one corner and bunch, which makes the blanket drag and creates hot spots. Fix: keep channels at 5 to 7 inches and add more rows if you need finer distribution.
- Choosing stiff or scratchy fabric. A rough surface against a child’s skin ends the experiment within a few nights. Fix: wash a sample first and let your child touch it.
- Skipping the washable filler. Rice, beans, dried beans, and dried peas attract pests and mold, and metal washers or cherry pits are unsafe and hard to distribute. Fix: use washable poly pellets or glass beads rated for this purpose.
- Cheap pellets that soften in the wash. Low-melt fillers deform in a dryer and leave a flat, useless blanket. Fix: buy filler labeled non-toxic with a high melt point.
- A long stitch length. Default settings let pellets leak through the seams after a few washes. Fix: shorten the stitch and backstitch every seam start and end.
- Breaking needles. A pellet that bounces up under the presser foot snaps a standard needle, and the fragment ends up inside the blanket. Fix: use a denim or heavy-duty needle and sew the empty channels before any filling is nearby.
- Skipping the final inspection. Fix: do the flat-hand check and the seam check every time, before the first use and after every wash.
A few extra tips. Buy a kitchen scale you can tare, and weigh every pocket rather than eyeballing. Use safety pins to hold layers before sewing, since the fabric shifts under weight. Check your washing machine’s capacity, which is often around 20 pounds, and if the blanket is heavier, clean the cover and spot clean the inside. Skip batting if your child runs hot, since batting plus a warm fabric is the most common overheating complaint. And if you might add weight later, plan for removable inner pockets from the start.
Frequently Asked Questions
What fabric is best for a DIY weighted blanket?
Tightly woven cotton or a cotton blend is the safest choice for a child’s blanket. It is breathable, durable, machine washable, and familiar to most kids’ skin. Flannel works if your child feels cold but tends to run warm. Skip fleece and minky if overheating is a concern, and avoid any fabric with loose fibers, dangling threads, or small decorative parts.
How much weight should a child’s weighted blanket have?
Ask your child’s pediatrician or occupational therapist for the number rather than calculating it yourself. Many clinicians reference roughly 10 percent of body weight, with lighter amounts for children who run hot or are new to weighted sleep. The right weight also depends on blanket size, so a blanket that is too large for the body can feel heavier than its total weight suggests.
Can I make a weighted blanket without a sewing machine?
Yes, but it takes considerably longer. Hand-sew the grid with a doubled thread and a short stitch length, using a sturdy backstitch at every seam start and end. The easier no-machine route is to sew or buy a simple cover with a wide opening and use a removable washable weighted insert inside it, which also makes washing far simpler.
How do I keep the weight from shifting or bunching?
Use small pockets, fill each one with the same measured weight, and leave it slightly puffy rather than packed tight. Mark the grid from the center outward so channels stay even, sew with a short stitch and a half inch seam allowance, and spread each pocket flat with your palm as you fill it. A slow, flat finish matters more than how tightly you pack the filler.
Is a DIY weighted blanket safe for a child with autism?
Many autistic children benefit from consistent deep pressure for sleep and regulation, which is why parents ask about homemade versions. A homemade blanket can be fine when the weight comes from a qualified clinician, the materials are washable and non-toxic, and an adult supervises early use. Never use one on an infant, and stop if your child becomes distressed, restless, or short of breath.
How should I wash and care for a weighted blanket?
Check your washing machine’s capacity first, since household machines often top out around 20 pounds. Wash in a front-loading machine on a gentle cycle with mild detergent, close the velcro or zipper fully, and skip fabric softener. Tumble dry low or air dry flat. Inspect the seams after every wash, and have the cover professionally cleaned if the blanket is too heavy for your machine.
Conclusion
Start with a conversation, not a cutting mat. Ask a pediatric clinician or occupational therapist what weight your child should have, then choose breathable cotton in a size that covers the body without pinning the arms, cut a 5 to 7 inch channel grid, and weigh every pocket the same amount.
Weighted products affect children differently, and no blanket is worth a child’s distress or breathing trouble. Introduce yours with an adult close by, inspect the seams after every wash, and take it out of the routine at the first sign that your child does not like it.
A weighted blanket works best as one part of a wider sensory plan. If you are still building that plan, our guide to making a calm down corner at home covers the space around the bed, and making transitions between activities easier covers the rest of the day. For outings, our checklist for building a go bag for a child with medical needs keeps the same supports within reach.