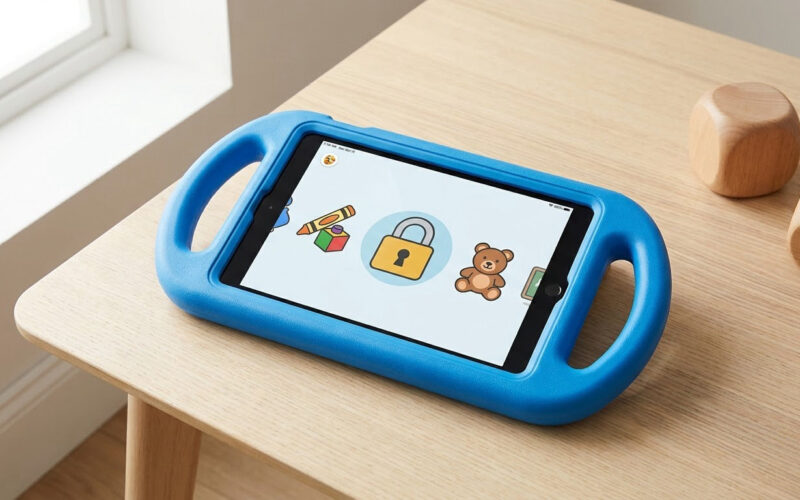
To teach money skills to a child with a disability, practice in the moments already happening: the grocery trip, the allowance, the school lunch account, the vending machine. Break money into small steps, back each one with a visual or written support, use the same script every time, and step back only once the step holds. No separate money lesson is needed.
That sounds simple until you try it at 4pm on a Thursday with a child who melts down over the fluorescent lighting in the checkout line. Money is the hardest ordinary life skill there is, because it is abstract, it involves arithmetic, it happens in front of people, and nothing good happens for weeks. Nearly every child needs it taught deliberately. A child with a disability usually needs it taught a smaller number of times, with more support, over a longer stretch of time.
Some context on who we are writing for. Most money guidance aimed at disabled kids is written about autistic kids, and autism deserves its own specific adaptations. But the keyword parents actually search is broader: ADHD, intellectual disability, developmental language disorder, cerebral palsy and other physical disabilities, hearing or vision impairment, and chronic illness all change how money gets taught. The barriers overlap more than the field admits, so the methods below work across most of them, with a note where a specific diagnosis needs a different approach.
One thing to hold onto. If your child is non-verbal, minimally speaking, or has significant intellectual disability, nothing in this guide is out of reach. It just moves from spoken instruction to visual, tactile and partner-assisted methods. The skill is the same. The delivery changes.
Table of Contents
- What You Need
- Step-by-Step: How to Teach Money Skills to a Child With a Disability
- Step 1: Identify the Child’s Current Money Skills
- Step 2: Teach Money Through Familiar Routines
- Step 3: Practice Recognizing and Counting Money
- Step 4: Practice Paying and Change-Making
- Step 5: Set Up Simple Saving and Spending Goals
- When to teach money skills when saving never seems to stick
- Step 6: Support Independent Money Decisions
- Bringing in the school team and long-term supports
- Common Mistakes and Helpful Fixes
- Frequently Asked Questions
- At what age should a child with a disability begin learning about money?
- How can I teach money skills when my child does not use spoken communication?
- What if my child becomes overwhelmed by coins, cards, or busy stores?
- Should I use an allowance to teach money skills?
- How much money practice is enough each week?
- When should I ask for help from a special education teacher or financial professional?
- Conclusion: Start With One Real Money Routine
What You Need
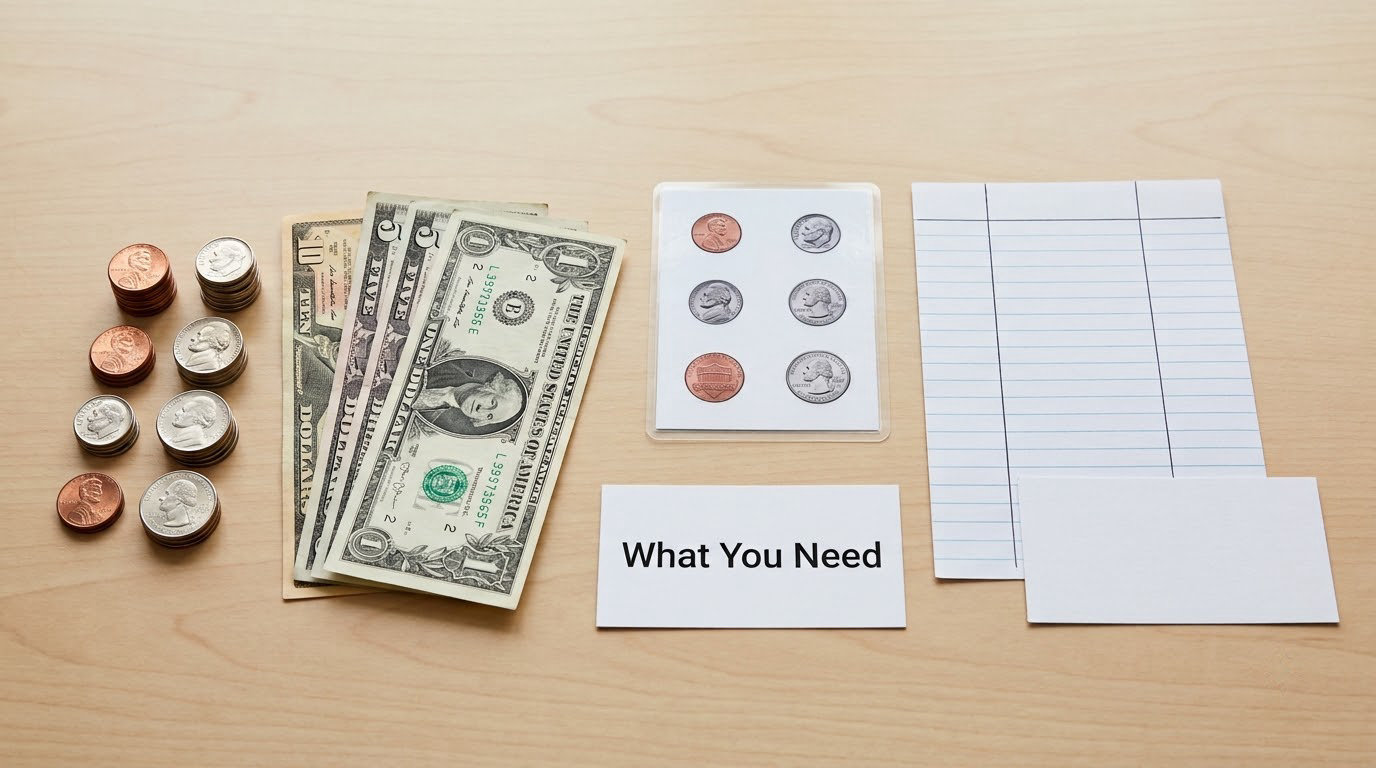
The materials are cheap and mostly printable. You are building a small kit you can carry in one folder or one tote bag, so practice can happen wherever your child is.
- Real money, or play money if real money is too distressing. Start with three or four coins at a time, not a full set. If coins trigger a sound or texture sensitivity, use plastic tokens, paper play money, or a coin identification app on a tablet.
- A coin holder or coin pouch. A slim canvas or vinyl coin belt with clear pockets means a child can see the value without counting out of a pile. Elastic loops on a page work too.
- A coin reference chart. A one-page laminated chart with a real photo of each coin and bill next to its written value. Photos of actual US money beat clip art every time, because recognition is the first hurdle.
- A first-then board and a written or pictorial task sequence. A first-then board is two panels: what is happening now on the left, what happens next on the right. The purchase task sequence below works for this.
- A simple spending tracker. A three-column paper chart is enough: spend, save, give. Add a stamp or a small sticker for each entry. Spreadsheets are too heavy for most children, and parents report the same thing about budgeting software.
- A communication tool. This can be a core board, a speech device, a picture exchange system, a notebook with pre-made money phrases, or simply a agreed-upon signal. Have it ready before you need it.
- A calculator. Permission to use one is not cheating. It removes working-memory load so your child can focus on the decision rather than the arithmetic.
- A pause plan. Written down, agreed in advance, so leaving the store is a known step and not a crisis. Include where you will go instead.
Skip anything that costs money and needs a subscription. Parent forums are full of people asking for free materials because the therapy, psychiatry and IEP meetings already eat the budget.
Step-by-Step: How to Teach Money Skills to a Child With a Disability
The sequence matters more than the activities. Money skill teaching works best when it moves from concrete routines your child already tolerates, toward independent decisions they make with less help from you. Rushing straight to choices is why so many parents give up. Below is roughly how that progression looks by age and readiness, then the six steps to run it.
| Skill | Age or readiness sign | How to teach it | Where to practice |
|---|---|---|---|
| Coin and bill recognition | Any age, no verbal sign needed | Match real money to a photo chart, one denomination at a time | At the kitchen table, then anywhere money appears |
| More and less | Around 3 to 5 | Two piles of coins, ask which is more, let them move them | Sorting laundry coins, feeding a coin jar |
| One item costs money | Around 4 to 6 | Take one coin from a jar for one small item, every single time | Vending machine, school snack, garage sale |
| Choosing between two options | Around 6 to 9 | Two real items with two real prices, child points or hands over the money | Grocery aisle, dollar store |
| Paying and counting change | Around 7 to 10 | Task analysis with a visual, next dollar method, fade prompts one at a time | Quiet checkout, school office, paying for a school trip |
| Saving toward a chosen goal | Around 8 to 12 | Named goal, picture of it, countdown calendar, money moved on a set day | A jar on the shelf, a transfer on payday |
| Needs versus wants | Around 9 to 13 | Sort real ads or catalogs into two or three piles together | Supermarket, online store front page |
| Earning money | Around 10 to 14 | Chore chart, or sell a real skill the child already owns | Home, neighbors, a school fair, online marketplace |
| Tracking spending | Around 11 to 15 | Child fills in the three-column tracker, adult checks it weekly | Weekly check-in, before a shopping trip |
| Bank account, then card | Around 13 to 16 | Joint account, low limits, alerts turned on, PIN kept by the child | Bank branch with an appointment, paying for things alone |
Step 1: Identify the Child’s Current Money Skills
Before you teach anything, write down what your child can already do. Not what they should be able to do at their age. Can they match a coin to a picture? Can they hand you an object when you say give me one? Can they wait for a short trip to the shop without losing it?
Also write down the access needs that will shape every lesson. What does communication look like? What does a busy room cost them in terms of regulation? Which hand movements are hard, and does that change at 5pm? Can they handle a full sentence, or do you need one instruction at a time with a pause?
Then choose one skill, not six. This is where most plans fall apart. A child learning to match quarters learns nothing new if the same session also introduces budgeting and price comparison. Pick the single next step your child is ready for, run it until it is boring, then move on.
Step 2: Teach Money Through Familiar Routines
Money is learned incidentally far more often than it is taught deliberately. The grocery trip, the school lunch account, splitting a packet of sweets with a sibling, paying the bus driver. Attach the lesson to something that is already happening and your child will absorb it without the pressure of a lesson.
Three things to make visible in every routine. Where the money came from. What it buys. Why the coins are different sizes. You can say it out loud in one line: this came out of the food budget, and it buys bread and milk. Children with strong pattern recognition will pick up far more of what you say than what you show once.
Keep the same script every time. Same greeting at the shop, same words, same order of steps. Predictability does more for new learning than novelty does, and it is the cheapest accommodation available to you.
Step 3: Practice Recognizing and Counting Money
Recognition comes before counting comes before exchange. Do not skip ahead. A child who cannot reliably identify a quarter cannot make change, no matter how well they count.
Start small. Three denominations, one session, five minutes. Lay out the coin, let your child handle it, match it to the photo chart, then return it. Repeat until it is unremarkable. Add the fourth coin the next week. Let your child be the one who does the handling, not the adult. Repetition without pressure builds the automatic recognition you need later, when a checkout lane is loud and fast.
Check understanding without asking a question that requires an answer. Watch whether your child picks up the right coin when you point to the price on the chart. Ask them to find the coin you say. A yes-or-no question tests language, not money knowledge.
Step 4: Practice Paying and Change-Making
Use a written task analysis, because this skill has more steps than anyone realizes. Here is one that works for buying a single item:
- Go into the shop with me.
- Pick up one item from the shelf.
- Carry it to the counter.
- Say or show the price.
- Take the money out of your pouch.
- Count out the amount.
- Hand it to the cashier.
- Wait.
- Take the change.
- Check the change against the price.
- Say thank you.
- Leave the shop.
Put it on a phone, a laminated card, or the first-then board. Run it with full support, then with less. Give one prompt, wait five seconds, give one more. Prompting that never goes away teaches dependence, so fade one prompt at a time, never all at once.
Cut the arithmetic with two habits. Use the next dollar method: if the item costs three dollars and forty-seven cents, hand over four dollars and keep the change, so the counting is a single coin rather than a subtraction. And let the calculator do any addition, while your child does the decision. What you are teaching is judgment, not mental arithmetic.
Practice where the pressure is low. A school office, a quiet checkout in a small shop, a vending machine in an empty hallway. A Friday supermarket queue is not the place to introduce a new skill.
Step 5: Set Up Simple Saving and Spending Goals
Saving is the hardest item on the list, because it asks for something today in exchange for nothing visible. Make the goal real and make the waiting short.
Name the goal in words and put a picture of the actual thing on the jar. A labeled jar with a photo taped to it beats an abstract savings account at every stage. Choose something they want, with a price they can partly cover, and a timeline of weeks rather than years. A child who waits months learns nothing and gives up.
Move money on a set day, not on a good day. Whatever payday is for your family, savings moves the same day every time. Consistency teaches the rule; enthusiasm does not.
When to teach money skills when saving never seems to stick
If the money disappears the moment it arrives, the problem is usually not knowledge. It is that nothing is being held back from the moment of receipt. Split the amount the instant it is earned: some goes straight into the save container, some into spend, some into give. A parent on a disability forum described splitting it three ways as the change that finally worked for her daughter.
Build on what your child already does well. One parent described a teenager who sold animal masks online, traded collectible cards and mended stuffed animals. That is real money behavior, and teaching the record-keeping around it was far easier than starting from nothing. Interests are a money curriculum.
If money is genuinely tight, allowance is optional. Paid jobs around the house, a garden, washing a car, sorting a neighbor’s recycling, helping unpack a delivery. Earning is the lesson that matters more than the amount, and the amount can be small.
Step 6: Support Independent Money Decisions
Once a step holds across at least two settings and two weeks, reduce your role. That is the real signal of readiness, not a birthday. Parents describe the same pattern: standing back only after the skill holds at a lower level.
Offer choices inside safe limits rather than no choices at all. Two items they pick between, three days they choose the spending day, a spending amount you set and they manage. Choice keeps them in the transaction, which is where learning happens, and keeps your risk bounded.
Teach the safety rules alongside, not later. Never share a PIN or a password with anyone who is not a parent or named supporter. Check with a trusted adult before agreeing to anything involving money. Walk away from any offer that needs a decision fast. If you give them a card, set a low limit, turn on transaction alerts, and check together once a week rather than daily.
Financial exploitation is usually not a stranger with a van. It is a peer who says just this once, just this once, and a card that does not ask for permission. Say the words for it in advance so your child has them ready.
Bringing in the school team and long-term supports
Ask your case manager whether money belongs in the IEP or transition plan for older students. A goal like counting money to pay for a purchase, measured across settings, gets funded instruction time. Without it, this sits entirely on you, and you probably do not have the hours.
For the long game, the names worth knowing are The Arc, the Center for Parent Information and Resources, your local Center for Independent Living, and PNC Practical Money Skills for free lesson plans. If benefits, work, or accounts are part of the picture, talk to a qualified benefits adviser or a special needs financial planner. That is a separate conversation from teaching, and worth having before adulthood rather than at it.
Common Mistakes and Helpful Fixes
Moving too fast. Adding a new money step every week feels productive and produces nothing. Fix: hold one skill until it feels boring, then add one step.
Teaching only with worksheets. A worksheet teaches recognition on paper, not a transaction with a cashier. The Community-Based Instruction principle generalizes: the skill has to be practiced where it will be used. Fix: keep the worksheet, then practice the same step in a real shop within the week.
Requiring a spoken explanation. Asking why they chose something tests language, and a child who does not use speech will fail a money assessment for the wrong reason. Fix: accept pointing, gesture, showing the coin, or a device screen as the answer. If they can select one of two options reliably, they have answered.
Making every mistake a consequence. Overdrafts and overspending teach fear of money, not skill. Fix: set low, real limits where a mistake costs a few dollars and nothing more. Choose your store, your day, your item.
Ignoring sensory and motor needs. Coins are noisy, small and slippery. Cash handling may be genuinely hard for hands with limited fine motor control, and packing a wallet can be a two-minute battle. Fix: fewer coins, larger notes, a lapboard rather than a counter, seated rather than standing, and an alternative access method for signing if handling money is not possible.
Only practicing in public places. A successful purchase at the supermarket feels like a win and should be celebrated. Then you have a new skill in a new setting and no baseline. Fix: run the routine at home with play money and a mock checkout first. Generalization across settings is a skill too.
Measuring by age instead of readiness. A fourteen-year-old who cannot yet match a coin to its value needs coin matching, not budgeting software. Fix: use the readiness column, not the age column, and accept a slower path without treating it as falling behind.
Two things that help more than any worksheet. Practice in the same routine until it is boring, and praise the specific step rather than the outcome, so the behavior is what gets reinforced. A child who is praised for handing over the money without the reminder will do it again tomorrow.
Frequently Asked Questions
At what age should a child with a disability begin learning about money?
Start as soon as your child shows interest in real objects, often around age two or three, and treat readiness as the real marker. There is no age at which it is too late, and a child with intellectual disability may need the same concrete first step for years. The first goal is recognition, not arithmetic. Most children are ready to choose between two real items with two real prices somewhere around six to nine.
How can I teach money skills when my child does not use spoken communication?
Swap every spoken instruction for something your child can access: a picture exchange system, a core board, a speech device, a written card handed over, a demonstration followed by a wait, or pointing to one of two written options. Assessment questions should be answered by selection or action, never by speech. Money recognition, sorting and handing over are all teachable without a single spoken word.
What if my child becomes overwhelmed by coins, cards, or busy stores?
Reduce the sensory load before you reduce the goal. Use fewer coins and larger notes, or plastic tokens and paper play money, and practice at a table at home with a mock checkout. For stores, go at quiet times, use a self-checkout or a staffed lane rather than the loud one, and write a plan for leaving that names the alternative. The skill does not have to be practiced in the hardest possible environment to be real.
Should I use an allowance to teach money skills?
An allowance is useful but not required, and it is the first thing families cut when money is tight. What matters is that your child connects effort to payment and then to choices, so paid jobs, helping a neighbor, or selling something they already make work just as well. If you do give an allowance, split it into spend, save and give the moment it arrives rather than at the end of the week.
How much money practice is enough each week?
Five minutes of focused practice, two or three times a week, is enough for most children, plus the incidental practice that happens on real errands. Consistency across months matters far more than any single session. If practice starts producing shutdown or avoidance, cut the length and keep the frequency. A short session that stays positive is worth more than a long one that ends badly.
When should I ask for help from a special education teacher or financial professional?
Ask the school team when money is not progressing, when it is disrupting family life, or for a student nearing transition age, so it can be written into the IEP or transition plan as a measurable goal. Ask a benefits adviser or special needs financial planner when benefits, work, or long-term accounts are part of the picture, ideally years before adulthood rather than at it.
Conclusion: Start With One Real Money Routine
Pick one moment your child already tolerates. The grocery trip, the vending machine, the coin jar. Make it a written sequence, run it with the same script, and stay at it until it feels easy. Add the next skill only after the current one stops being a struggle.
That is the whole method behind how to teach money skills to a child with a disability. Small steps, real money, real places, less help from you over time. It is slower than the guides that promise independence by a certain birthday, and it works far more often than a worksheet ever will.