To make gluten free pizza dough, mix a measured gluten free all-purpose flour blend (with xanthan gum included) with warm water, a little olive oil, sugar, salt, and instant yeast, then rest the dough, shape it by hand, and bake it hot enough to set the crust before the center turns gummy. The whole thing takes about two hours from counter to oven, most of it waiting, and the single biggest reason people get it wrong is treating it like wheat dough. It is not wheat dough. There is no gluten network to develop, so kneading buys you nothing and a second rise is not available to you.
That one difference changes everything: how much liquid you add, how long you wait, how gently you handle it, and why a conventional home oven needs a par-bake. Read the whole method once before you start, then adjust the hydration and resting time to match your own flour blend.
The dough also rewards weighing your flour rather than scooping it. Cups lie with gluten free flour, because brands differ in weight per cup and in how much liquid they drink up. If you have a kitchen scale, use grams.
Table of Contents
- What You Need for Gluten Free Pizza Dough
- Ingredients for one 12-inch pizza
- Equipment
- Which flour blend to buy
- Step-by-Step: How to Make Gluten Free Pizza Dough
- 1. Choose the Base: How to Make Gluten Free Pizza Dough That Holds Its Shape
- 2. Activate the Yeast and Combine the Dry Ingredients
- 3. Mix the Dough Until It Looks Slightly Shaggy
- 4. Rest or Chill the Dough for Better Handling
- 5. Shape the Dough on Parchment or a Pizza Stone
- 6. Top and Bake Until the Crust Is Golden
- Common Mistakes and Tips for Better Gluten Free Pizza
- Adjust the water to your flour, not the recipe
- Keep cross-contact off your work surface
- Skip the yeast when you want pizza tonight
- Storage and freezing
- Frequently Asked Questions
- Why is my gluten free pizza dough gummy in the middle?
- How long should gluten free pizza dough rise?
- Do you knead gluten free pizza dough?
- Can I make gluten free pizza dough without yeast?
- How do I stop the dough from tearing when I stretch it?
- How hot should I bake gluten free pizza at home?
- Conclusion: Start With a Simple Gluten Free Pizza Dough
What You Need for Gluten Free Pizza Dough

Gluten free pizza dough is a yeast dough built from flour, water, oil, and a binder that stands in for gluten. The binder is the part most people skip, and it is the reason a gluten free crust can be chewy instead of tasting like a cracker.
Ingredients for one 12-inch pizza
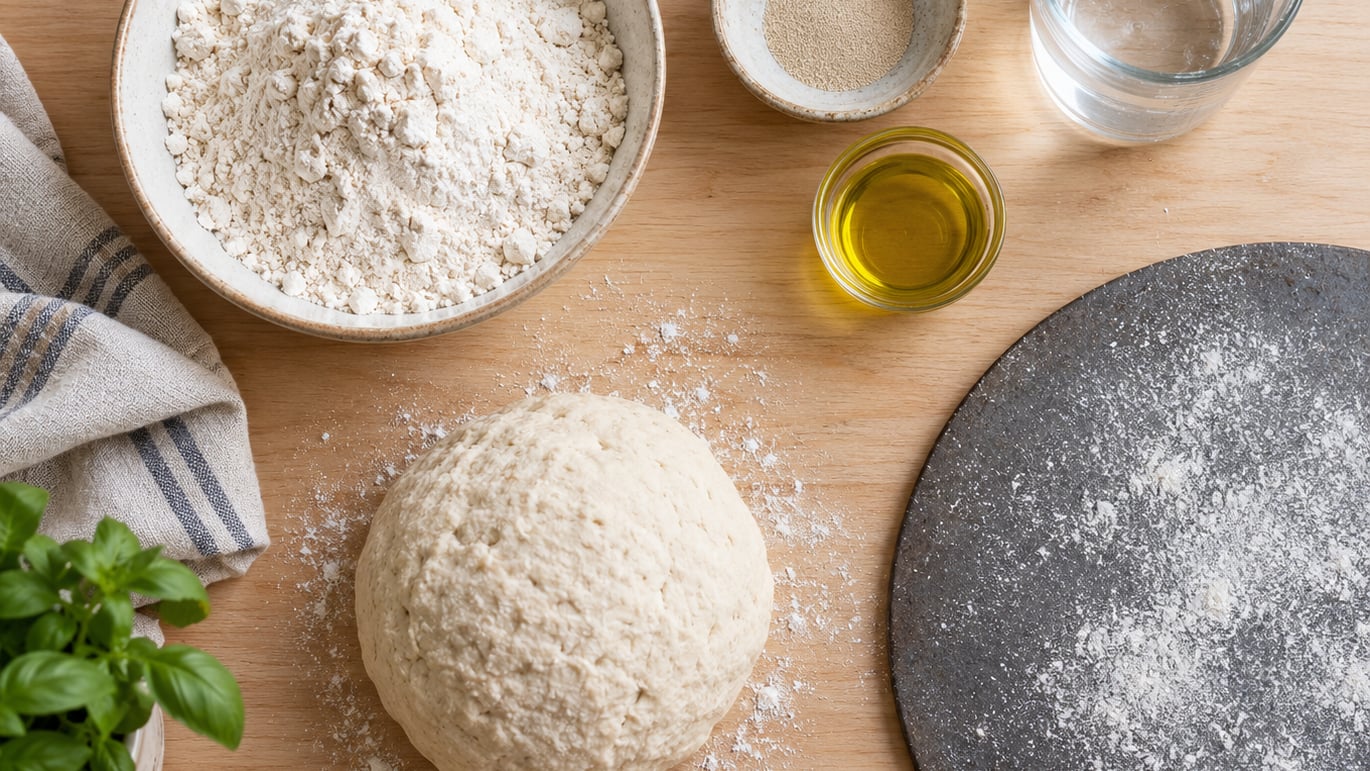
- 3 cups (about 300 g) gluten free all-purpose flour blend, with xanthan gum already included
- 1 tablespoon (about 4 g) instant yeast
- 1 1/2 teaspoons sugar
- 1 1/2 teaspoons kosher salt
- 1 1/8 cups (270 ml) warm water, roughly 100 to 110°F
- 4 1/2 tablespoons olive oil, divided
- 1 teaspoon psyllium husk powder, optional, for extra chew and stretch
For a quick-rise version, swap the yeast for 1 teaspoon baking powder plus 1/2 teaspoon baking soda, skip the sugar, and rest the dough only 20 minutes. Baking soda versions need an acidic ingredient to activate properly, so a tablespoon of lemon juice or a plain yogurt works well if you are using it.
Equipment
A baking steel or stone gets you the crisp bottom, and a pizza peel or a rimless sheet pan makes the transfer far less dramatic. Parchment paper is genuinely useful for celiac households because it never touches a flour-dusted surface. A stand mixer is optional; a bowl and a sturdy spoon will do the job, since there is no gluten to develop and a stand mixer mainly saves your arm on a stiff blend.
Which flour blend to buy
Three routes work, and they are not equally forgiving. This is the comparison most recipe pages skip.
| Flour option | Binder | Flavor | Best for |
|---|---|---|---|
| Measure-for-measure blend (Bob’s Red Mill, King Arthur GF, Pamela’s) | Xanthan gum included | Neutral, faintly sweet | Beginners and weeknight pizza |
| Single flour (sorghum, brown rice, white rice, cassava) | You add the gum or psyllium | Grainy for brown rice, nutty for sorghum | People who react to blends of many ingredients |
| From-scratch multi-flour blend (brown rice, sweet white rice, potato starch, sorghum) | Xanthan gum or psyllium, measured separately | Closest to wheat bread | Pizza-oven bakers chasing chew and oven spring |
| Coconut or almond flour | Egg usually required | Sweet, rich | Very low-carb crusts, not a wheat substitute |
If you are avoiding gluten because of celiac disease rather than preference, read my guide to how to read a label for hidden gluten before you buy a blend, and check that the flour is milled and packaged in a dedicated gluten free facility.
Home bakers on Reddit’s gluten free baking communities repeatedly name a few blends as producing the closest thing to a wheat pizza crust. Caputo and Fioreglut come up often, and several people report that adding 3 tablespoons of psyllium husk powder to a general purpose gluten free flour noticeably improves both stretch and chew. That is a lot of psyllium for a single pizza, so start with the 1 teaspoon above and work upward.
Step-by-Step: How to Make Gluten Free Pizza Dough
The method below assumes a conventional home oven. Pizza oven instructions sit inside step 6.
1. Choose the Base: How to Make Gluten Free Pizza Dough That Holds Its Shape
Pick one route and stay with it for a few bakes before switching. A measure-for-measure blend is the least frustrating starting point because the gum is already proportioned for the flour, and most of the failure I have seen comes from adding gum on top of a blend that already contains it.
If you build your own blend, a workable starting ratio is 2 parts brown rice flour, 1 part sweet white rice flour, 1 part potato starch or tapioca starch, and 1 part sorghum flour, plus 1 to 2 teaspoons xanthan gum per cup of total flour. Potato starch is what gives you crisp edges and a tender middle, so do not leave it out.
2. Activate the Yeast and Combine the Dry Ingredients
Warm the water with a splash of the sugar until it feels like bathwater on your wrist. Stir in the instant yeast and wait 5 minutes; if the surface is not faintly frothy, your water was too hot and the yeast is dead. Start over with cooler water rather than adding more yeast.
Whisk the flour, salt, and remaining sugar in a large bowl, then stir in the optional psyllium husk so it is dispersed through the dry mix rather than sitting in one wet pocket. Psyllium clumps badly if it hits water first.
3. Mix the Dough Until It Looks Slightly Shaggy
Pour in the wet ingredients and stir with a sturdy spoon. Add the 2 tablespoons of olive oil, then keep mixing until no dry flour is visible, about a minute. The dough should look like slightly shaggy play dough, not a smooth ball.
Do not knead it. Ten minutes of kneading does not create an elastic network because there is no gluten to align, and it usually just makes the dough denser and less workable. If the dough feels tight and unabsorbed, add water a teaspoon at a time; if it is tacky and sticking to everything, dust with a little extra flour.
4. Rest or Chill the Dough for Better Handling
Cover the bowl and let it rest at room temperature until nearly doubled, roughly 60 to 90 minutes depending on how warm your kitchen is. One rise is the ceiling here. The dough cannot rise a second time because there is no protein matrix holding gas, and pushing for it is what gives people dense, bready, disappointing pizza.
For easier shaping and a deeper flavor, let that same single rise happen cold in the refrigerator for 12 to 48 hours. People baking in outdoor pizza ovens report that a 48-hour cold ferment gives a fluffy, chewy crust that is not gummy at all. Take the dough out 45 to 60 minutes before you shape it, because cold dough tears.
Rest the dough in the container it will rise in. That keeps the shape tidy and makes the transfer to the fridge a single move.
5. Shape the Dough on Parchment or a Pizza Stone
Turn the dough onto a surface dusted lightly with cassava flour or white rice flour. Never dust with wheat flour, and be careful with cornmeal, which contains gluten and is a common celiac trigger through cross-contact.
Press it out from the center with your fingertips, leaving the outer ring untouched. Then lift an edge and stretch, working clockwise a few times. The dough should stretch and drape like soft leather rather than snapping.
When it springs back and refuses to hold, stop fighting it. Wait 5 to 10 minutes and try again, and the dough will relax. If it still will not stretch, roll it out between two sheets of parchment with a pin; that works perfectly well and nobody will know.
Transfer to a peel dusted with flour, a rimless pan, or straight onto a stone or steel. Moving the dough on parchment is the least fragile option, and the parchment peels away once the crust has set.
6. Top and Bake Until the Crust Is Golden
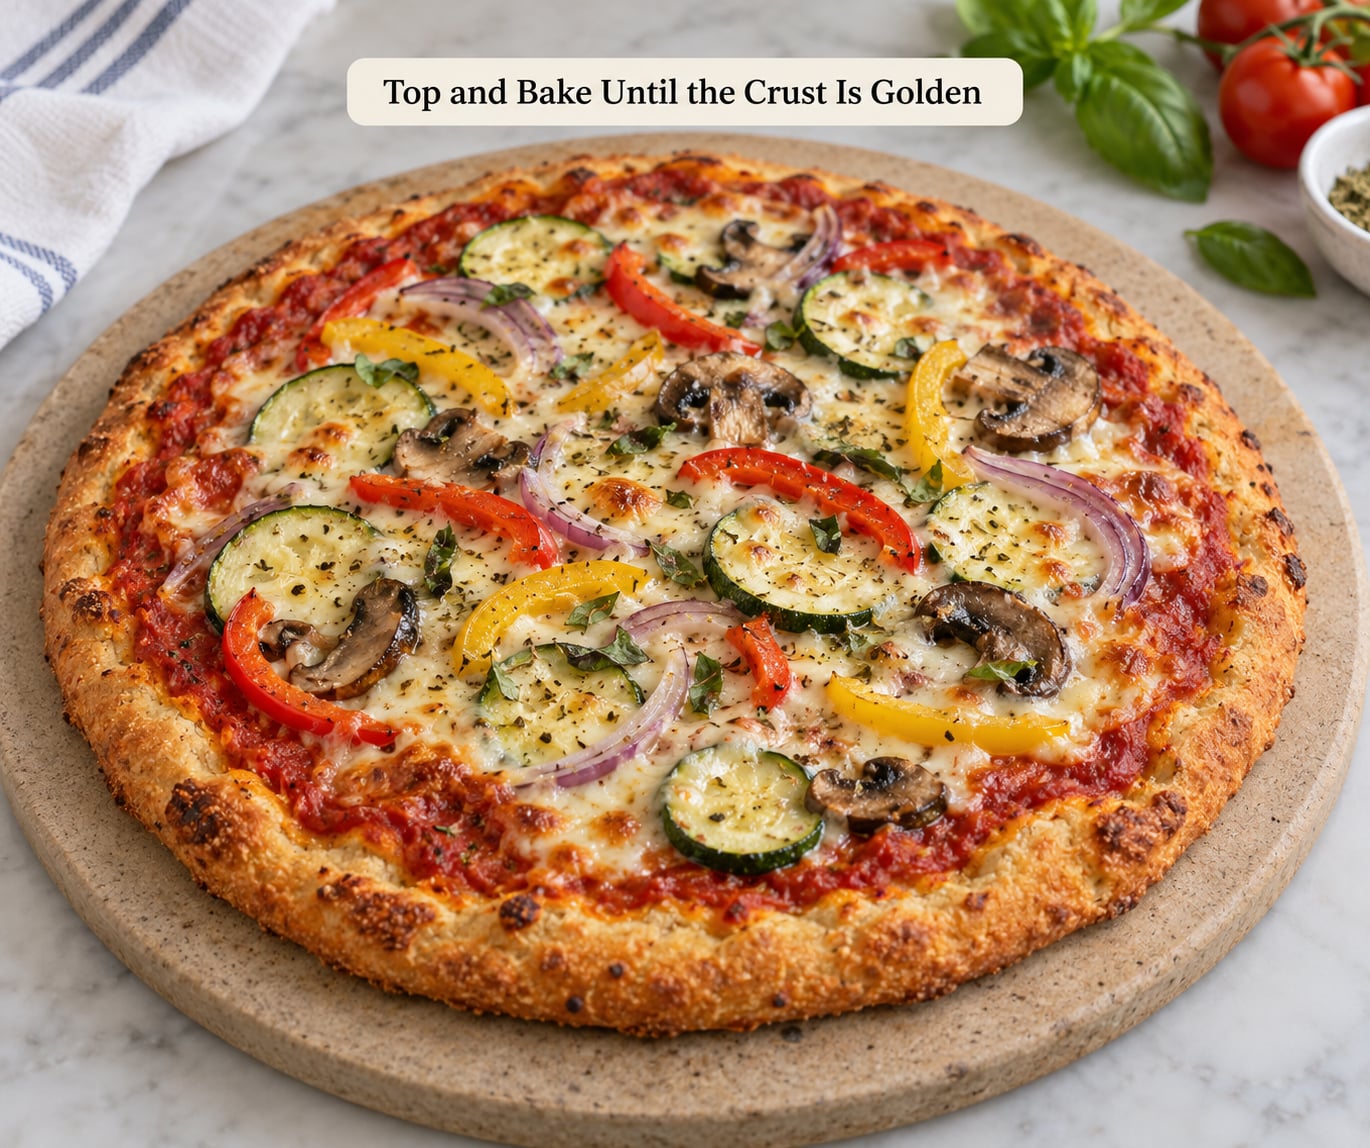
In a conventional oven, heat to 475°F (245°C) with a stone or steel inside for at least 30 minutes. Par-bake the shaped crust for 4 to 6 minutes, until the surface looks dry and faintly set and the edges pull from the stone. Slide the pan out, top it, and return it for another 6 to 10 minutes.
| Oven | Temperature | Par-bake | Finish |
|---|---|---|---|
| Conventional with stone or steel | 475°F (245°C) | 4 to 6 minutes | 6 to 10 minutes |
| Conventional, no stone | 450°F (230°C) | 6 to 8 minutes | 8 to 12 minutes |
| Outdoor pizza oven | 550 to 650°F (290 to 345°C) | Skip it | 2 to 4 minutes |
Skip the par-bake only in a very hot pizza oven. In a home oven it is the single change most likely to fix a gummy center.
Done means the bottom is deep golden and the cheese is bubbling with a few brown spots. Add toppings that carry raw chicken or ground meat only after they reach a safe internal temperature, and let cooked meat sit at room temperature no more than two hours.
The remaining 1 1/2 tablespoons of olive oil goes on the crust before baking, brushed on lightly. It browns better than sauce alone and keeps the rim from drying out.
Common Mistakes and Tips for Better Gluten Free Pizza
Almost every gluten free pizza complaint I hear traces back to one of five things: water, shaping, an underheated oven, too many toppings, or a dough that was left raw in the middle. Here is how to diagnose each.
| Problem | Cause | Fix |
|---|---|---|
| Gummy center | Wet dough, or baked too soon at low heat | Bake one to two minutes longer and par-bake the crust first |
| Cracks around the rim | Dough dried out or was stretched too thin | Add oil, rest longer, and stop stretching that section |
| Dough springs back while shaping | Cold or under-rested dough | Wait 5 to 10 minutes and stretch again |
| Crust too stiff or cracker-like | Missing or doubled binder | Add 1/2 to 1 teaspoon psyllium husk per cup of flour |
| Soggy middle under heavy toppings | Wet, heavy topping load | Pre-cook meat, drain vegetables, and use a light hand |
| Burnt rim, pale center | Uneven oven heat | Rotate the pizza halfway through the final bake |
| Crumbling when sliced | Cut too soon or crust is very thin | Rest the pizza 2 minutes and use a sharp knife in one motion |
Adjust the water to your flour, not the recipe
Hydration is the biggest variable when you switch brands, and recipes cannot tell you where your particular bag lands. Start at the 270 ml for 300 g of flour and then adjust on the second bake. Sorghum-heavy and brown rice blends drink noticeably more water than starch-heavy ones, while blends with psyllium added absorb like a sponge.
Judge by feel rather than the clock. If the dough is tacky after mixing, you have too much water. If it feels tight and crumbly at the edges of the bowl, you have too little.
Keep cross-contact off your work surface
For a celiac household, the flour is the easy part. The risk sits in the shared bin, the dusting flour, the toaster crumbs, and a stockpot of wheat noodles simmering next door. Wipe down the counter, use a dedicated scoop for the flour, and store the blend sealed and clearly labeled away from the family flour. If you are not sure about a brand’s milling setup, my guide to hidden gluten on labels walks through what to look for.
Skip the yeast when you want pizza tonight
A no-yeast crust needs no rise at all. Stir 2 cups of a gluten free blend with 1/3 cup water, 3 tablespoons oil, and a pinch of salt, rest it 10 minutes for the flour to hydrate, and stretch it. It bakes flatter and crisper than a yeasted dough, which suits a flatbread style more than a Neapolitan one.
If your dough also needs to be egg free, my post on how to replace eggs in baking covers the binders that work in a baked crust. For chew without any gum at all, a psyllium husk dough is your best bet, and I use the same approach when I want a gluten free loaf that is not dry.
Storage and freezing
Bake or chill dough balls in a single layer, then move them to an airtight container or a freezer bag. Refrigerated dough keeps about 3 days; frozen dough keeps 3 to 4 months. Freeze it after the rise, not before, and thaw it overnight in the fridge rather than on the counter so the dough does not go sour.
Rolled and baked crusts can be frozen too, stacked with parchment between the layers, and reheated in a hot oven or a dry skillet for a few minutes. An air fryer does a good job on them too.
Frequently Asked Questions
Why is my gluten free pizza dough gummy in the middle?
A gummy center usually means the crust went into the oven too wet or the bake was too short. Two fixes cover almost every case: par-bake the shaped crust for 4 to 6 minutes before topping it, and add one or two minutes to the final bake. Underbaking also happens when a home oven runs cooler than its dial, so give the crust a full minute past the recipe time.
How long should gluten free pizza dough rise?
One rise, and that is the practical limit. Most doughs need 60 to 90 minutes at room temperature, or 12 to 48 hours in the refrigerator for a cold ferment with better flavor. You cannot proof it twice because there is no gluten network holding the gas from a second fermentation. If it has already doubled, shape it and bake it.
Do you knead gluten free pizza dough?
No, and this is where most recipes go wrong. Kneading develops gluten in wheat flour, and gluten free dough has none to develop, so kneading only makes it denser and harder to stretch. Mix until no dry flour is visible and stop. What the dough needs instead is time to hydrate, which is what the rest and the cold ferment provide.
Can I make gluten free pizza dough without yeast?
Yes, and it takes about ten minutes of prep and no rise at all. Stir 2 cups of gluten free flour blend with 1/3 cup water, 3 tablespoons olive oil, and a pinch of salt, then rest it 10 minutes so the flour hydrates before you stretch it. The result is thinner, crisper, and flatter than a yeasted crust, so keep the toppings light.
How do I stop the dough from tearing when I stretch it?
Work from the center outward with your fingertips and leave the outer ring alone until the last pass, which gives the rim room to stretch without tearing. Dust your surface with cassava or white rice flour, never wheat flour. If the dough keeps springing back, stop and wait 5 to 10 minutes before trying again, because cold or tight dough relaxes with rest.
How hot should I bake gluten free pizza at home?
475°F (245°C) with a stone or steel preheated for at least 30 minutes is the setting that gives you a crisp bottom and a set center. Par-bake the crust for 4 to 6 minutes before you add sauce and toppings. If you have an outdoor pizza oven, run it at 550 to 650°F (290 to 345°C) and skip the par-bake entirely.
Conclusion: Start With a Simple Gluten Free Pizza Dough
If you take one thing from this, make it the first one: measure your flour in grams and mix the dough until it looks slightly shaggy, then give it a single rise and a proper rest. That sequence alone fixes most of the gummy, cracked pizza people complain about.
After the first bake, adjust exactly two variables. Add or subtract water a teaspoon at a time until the dough stops feeling tacky, and extend the rest or the chill until the dough stretches without snapping. Everything else in the method holds steady across flour brands, and once those two are dialed in for your kitchen, you have a crust that is reliably chewy, crisp underneath, and worth the two hours.