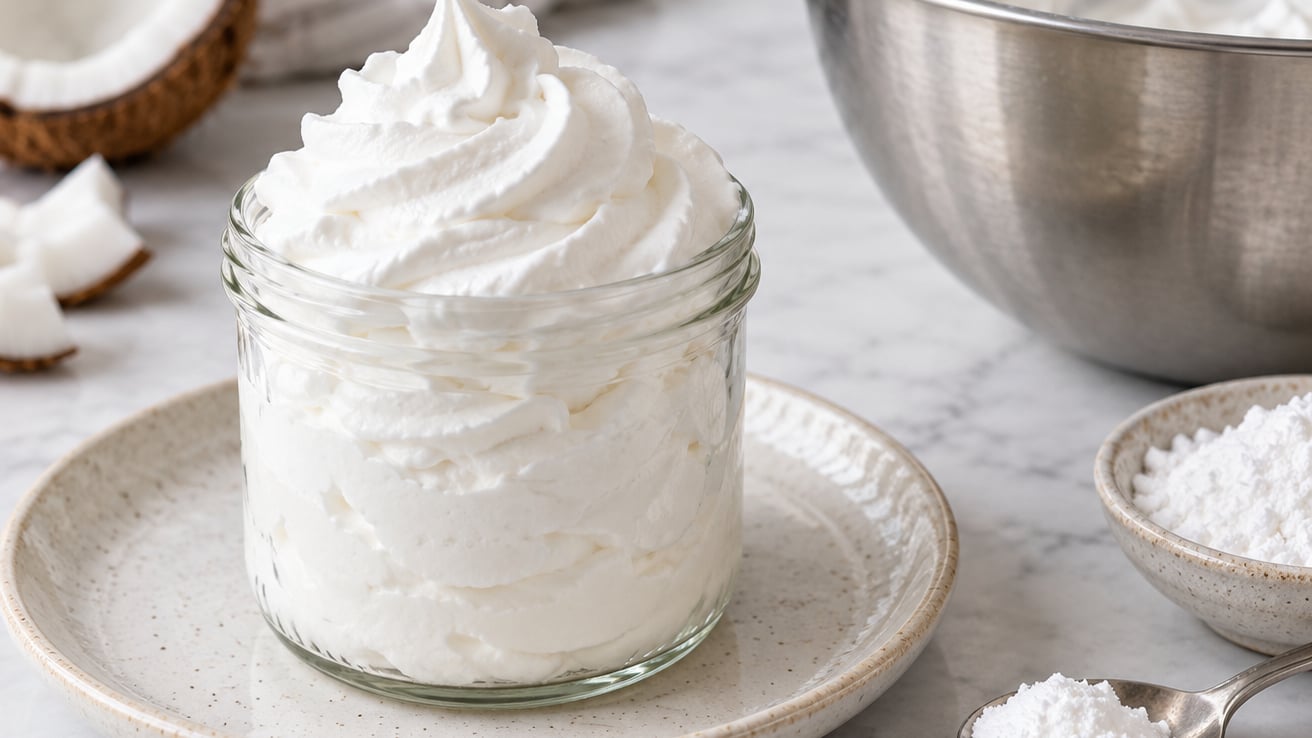
The fastest way to make dairy free whipped cream is a can of full-fat coconut cream, chilled overnight in the fridge, whipped with a little powdered sugar and vanilla. There is no cooking and no blender, and the whole thing takes about ten minutes of hands-on work. It is also the version that most reliably turns into something you can spoon over pie or float on hot chocolate.
The one thing that decides whether it works is temperature. Coconut cream whips when it is cold and stays slack when it is not, so the can, the bowl and the beaters all go in the fridge together before you start.
If your household avoids dairy because of an allergy rather than a preference, you will also want to read labels closely, because coconut is sometimes listed alongside tree nuts. My guide to setting up an allergen free pantry covers how I organise that shelf so I am not squinting at tiny ingredient lists at seven in the morning.
Table of Contents
- What You Need
- Step-by-Step: How to Make Dairy Free Whipped Cream
- Chill the Coconut Cream and Prepare the Bowl
- Whip Until Soft Peaks Form
- Sweeten and Flavor Dairy Free Whipped Cream
- Standard can versus separated coconut cream
- Serve or Store the Dairy-Free Whipped Cream
- Common Mistakes
- Frequently Asked Questions
- Can I make dairy free whipped cream without coconut cream?
- What plant milk can I use to make whipped cream?
- How do I thicken dairy-free whipped cream that is too loose?
- How long does homemade dairy free whipped cream last in the refrigerator?
- Can I freeze dairy free whipped cream?
- Why is my coconut cream not whipping?
- Conclusion
What You Need
- One 13.5 ounce can full-fat coconut milk or coconut cream
- 1 to 2 tablespoons powdered sugar or powdered monk fruit
- 1 teaspoon vanilla extract
- A small pinch of salt
- A metal bowl, ideally with a handle
- A hand mixer with beaters, or a stand mixer with a whisk attachment
- Chilled plant milk, only if your cream is too stiff to start
Look for a can labelled full fat, or one that lists coconut cream as the first ingredient. Light coconut milk has roughly a quarter of the fat and it simply will not hold air, no matter how long you beat it.
Open the can cold and look before you pour. Good coconut cream is solid white and scoopable, roughly the texture of soft ice cream, and it slides away from the can as one piece. If it pours like a thin milkshake, put the can back in the fridge for another day and check again. Water separating from the cream is normal and a sign that the can was stored upright.
One word of warning on the label: some brands add guar gum or other thickeners, and those keep the cream from whipping properly. I check the ingredient list once and then stop buying that brand for this job.
For swapping the base in baking, my list of dairy free substitutes for milk in baking covers the ratios that actually work, which are not the same as the ones for drinking.
Step-by-Step: How to Make Dairy Free Whipped Cream
Chill the Coconut Cream and Prepare the Bowl
Put the unopened can in the fridge for at least 24 hours, standing upright. Four hours gets you partway, but overnight is where the texture turns solid all the way through, and solid is the whole game here.
Chill your bowl and beaters in the freezer for 15 minutes while the can softens slightly in the fridge. A glass bowl warms up faster than metal, and a warm bowl is the second most common reason a batch stays soupy.
Scoop the solid cream into the cold bowl and leave the watery liquid behind. You will get roughly a cup and a half of cream from a standard can, which makes about eight generous servings.
Whip Until Soft Peaks Form
Start on low speed so the cream starts to foam and warm up evenly. After about 30 seconds, turn up to medium, then scrape the sides of the bowl with a spatula once the mixture is thickening.
Watch the peaks more than the clock. Soft peaks are the first sign you are nearly there: when you lift the beaters, the cream falls off in a lazy curl. Medium peaks hold a soft point that bends when you touch it, and stiff peaks stand straight up and keep their shape when you turn the bowl upside down.
A total of five to seven minutes on medium gets you from solid cream to stiff peaks. Most household mixers hold a full can in about six minutes.
A hand whisk works too, but expect ten to fifteen minutes of steady arm work. If you have no mixer at all, a small food processor gets you there in about four minutes, in short bursts of fifteen seconds with a scrape between each one.
Watch for the turn. Coconut cream that goes past stiff peaks goes grainy and then splits into coconut butter and water within about a minute, and that batch is finished.
Sweeten and Flavor Dairy Free Whipped Cream
Add the powdered sugar, vanilla, and salt at the soft peak stage, while the cream is still glossy and loose enough to absorb them. Anything you add earlier gets buried in the fat, and liquid poured into stiff cream just slides down and pools at the bottom.
Powdered sweetener dissolves without a trace. Granulated sugar does not, and honey or maple syrup leave the cream a little runnier, which is fine if you are spooning it over fruit and a problem if you are piping it.
Taste with a clean finger at medium peaks. One tablespoon of powdered sugar per can is a gentle vanilla topping, and two is dessert-pie sweet. Add a quarter teaspoon of vanilla at a time so it does not taste like a bottle.
For variations, stir in a tablespoon of unsweetened cocoa powder with the sugar, a teaspoon of cinnamon for an apple pie, or a dairy-free chocolate syrup mixed in at the soft peak stage. A spoonful of cold espresso turns it into a coffee topping that tastes like something from a cafe.
Standard can versus separated coconut cream
A standard can of coconut milk chills and separates into solid cream on top and water underneath, which is the method above. A can sold as coconut cream is already the separated, thicker product, so it needs no scooping, and it whips slightly faster.
The coconut cream can is easier when you are in a hurry, and it costs a bit more. Either one works for this recipe, so use whichever you can find and chill properly.
Serve or Store the Dairy-Free Whipped Cream
Whipped coconut cream is best on the day you make it. It holds its shape for about 24 hours in a sealed container in the fridge, and it weeps a little as it sits, which is why a puddle tends to form at the bottom of the container by morning.
Press plastic wrap directly onto the surface of the cream instead of covering the bowl loosely. That contact is what stops the weeping, and it also keeps the top from forming a skin.
Avoid topping a cake or a bowl of fruit until the moment you serve it. Fruit releases water as it sits, and whipped cream drinks that water and slides down the fruit.
Keep it cold and treat it like any other perishable topping. Refrigerate within two hours of whipping, and use a cooler than one hour if the room is hotter than 90 degrees. If it smells sour or has darkened, throw it out rather than tasting it.
Common Mistakes
Using light coconut milk. There is no technique that saves it. Buy full fat, or use a carton of coconut cream instead.
Warm equipment. A room-temperature bowl softens the cream faster than the mixer can set it. Chill the bowl and beaters for 15 minutes and let the can sit in the fridge for a full day.
Starting at high speed. High speed slaps air into the fat too fast, so the cream warms before it aerates. Ease up to medium over the first minute.
Over-whipping. The moment the peaks stop being glossy and turn matte and crumbly, stop. That is grainy coconut cream, and it cannot be beaten back into whipped form.
Too much liquid sweetener. Honey, maple syrup and dairy-free chocolate syrup all add water. Use powdered sugar for anything you plan to pipe.
Expecting dairy behaviour. Plant-based cream is less stable than dairy whipped cream, so it deflates faster and cannot be held at room temperature for a party. If you need it to sit out, look for a stabilised plant-based whipped topping instead.
Guar gum in the can. Thickened coconut cream will not hold air. Check the ingredient list, and switch brands if you see it.
A couple of serving tips that solve most problems: hold back a tablespoon of the unwhipped cream and fold it in at the end to loosen a stiff batch, and pipe onto a chilled or buttered surface so the swirls set rather than slump. For packed lunches, freeze small dollops on a tray and move them to a container once solid. I have more ideas in my dairy free lunchbox ideas for school post.
Frequently Asked Questions
Can I make dairy free whipped cream without coconut cream?
A little harder, but yes. Blend a chilled box of unsweetened soy milk with a quarter cup of refined coconut oil or sunflower oil until completely smooth, then whip. It takes closer to fifteen minutes of blending and the finished cream holds its shape better than coconut cream does. Aquafaba drained from a can of chickpeas also works, though it comes out thinner and needs a thickener.
What plant milk can I use to make whipped cream?
Unsweetened soy milk is the easiest plant milk to whip on its own, because its protein traps and holds air. Almond, oat and rice milks are too thin and turn loose unless you add fat. Melt a tablespoon of coconut oil or scoop a spoonful of vegan butter into a chilled half cup of any of them, blend until smooth, then chill again before whipping.
How do I thicken dairy-free whipped cream that is too loose?
Whip it another minute or two first, then add a small pinch of xanthan or guar gum and give it fifteen more seconds of mixing. One quarter teaspoon of gelatin bloomed in cold water does the same job. Skip cornstarch, since it needs heat. Re-chilling the bowl and beaters and whipping again is the no-ingredient fix and often works on its own.
How long does homemade dairy free whipped cream last in the refrigerator?
Whipped coconut cream tastes best within 24 hours and stays usable for about two days sealed in the fridge, though a little water collects at the bottom as it sits. Soy and oil-based versions keep three to five days. Press plastic wrap onto the surface rather than covering loosely, and refrigerate within two hours of whipping.
Can I freeze dairy free whipped cream?
Yes, and it is the easiest way to make it ahead. Freeze dollops on a lined tray, then transfer them to a container once they are solid. Thaw in the fridge for around 20 minutes and give them a quick whip before serving. Dairy-free cream holds up in the freezer better than dairy whipped cream does, though it still loosens slightly on thawing.
Why is my coconut cream not whipping?
Three things cause this. The can was light coconut milk, the cream was not cold enough, or the brand contains guar gum, which stops it holding air. Chill the can upright for 24 hours, confirm the cream is solid white when you open it, and skip any brand listing a thickener. Very light coconut milk will never whip properly, however long you mix it.
Conclusion
To make dairy free whipped cream, chill a can of full-fat coconut cream for a full day, scoop out the solid cream, and whip it on medium for five to seven minutes until the peaks stand up. Add the powdered sugar and vanilla once you hit soft peaks, then stop before the cream turns grainy. Most batches come together in about ten minutes once the can has done its overnight shift.