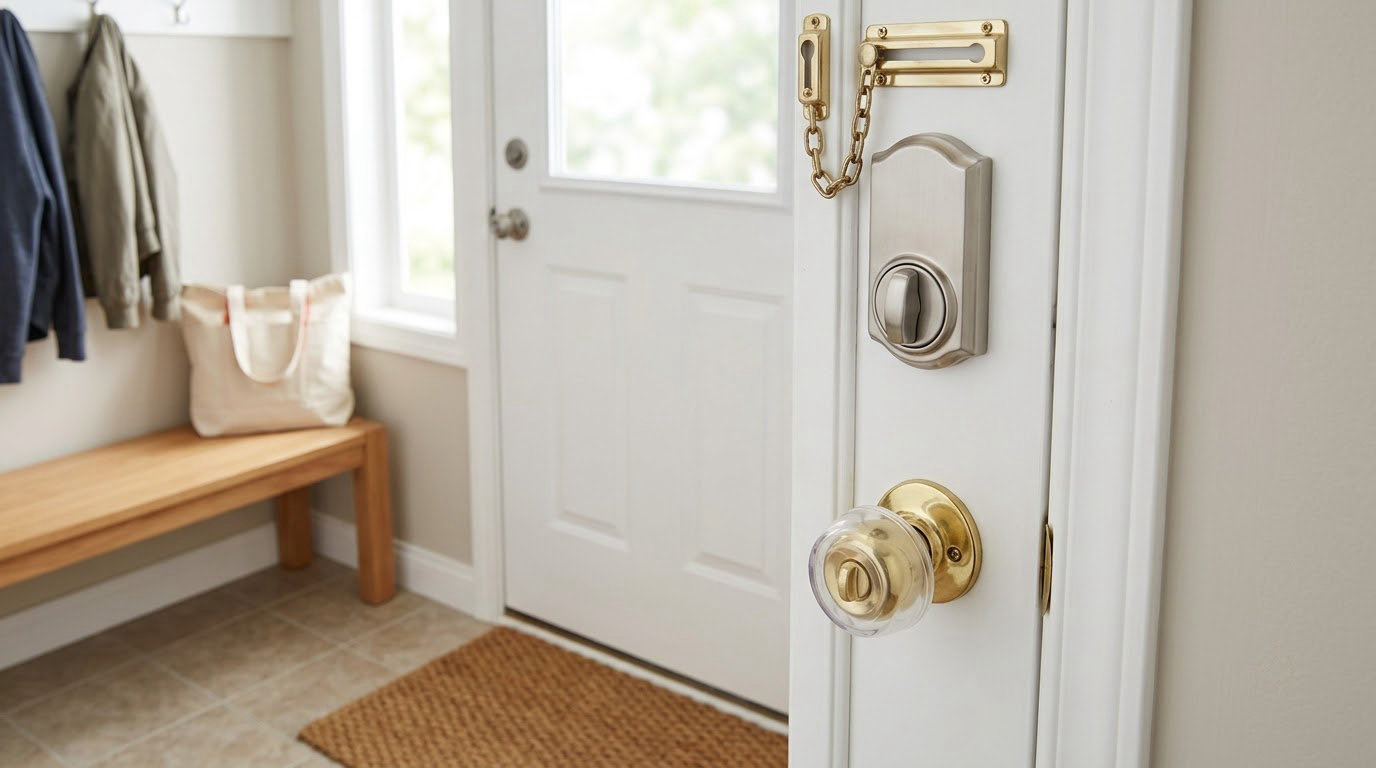
To childproof a home for a child who elopes, you build layers, not a single lock. Secure every door, window, and gate a child can reach, remove anything that lets them climb or push through, set an alert on each opening so you know the second one moves, and add a way to find them if prevention fails. One barrier is a plan with a hole in it.
About half of families of children with autism report a child who has eloped, and drowning is the deadliest form of it. The home is where most of that risk sits and where you have the most control, which is why working out how to childproof a home for a child who elopes properly beats bolting on a single gadget.
I want to be honest about something first, because the parent communities I read while putting this together are full of exhausted people. In two r/Autism_Parenting threads, one titled “Eloping child – desperate” and another called “I feel…defeated,” parents describe alarms on every single window and door and still not feeling safe. One family found their child had opened a living room window, pushed the screen out, and ran down the road, all while the parent sat on the couch in the same room. Another parent described a five-year-old who popped a window out of the frame entirely, glass and all.
Those are not parenting failures. They are information about where locks fail. Use it.
Table of Contents
- What You Need
- Step-by-Step: How to Childproof a Home for a Child Who Elopes
- Step 1: Identify Every Possible Exit Route
- Step 2: Create Layers of Protection at Doors and Windows
- Step 3: Secure the Yard, Garage, and Outdoor Areas
- Step 4: Make the Home Hard to Leave During High-Risk Times
- Step 5: Use Alerts, Tracking, and Communication Tools
- Step 6: Teach and Practice a Safety Plan
- Step 7: Rehearse an Elopement Response and Review the Plan
- Common Mistakes
- Frequently Asked Questions
- Conclusion
What You Need
Most families start with the front door and stop there, which is exactly how a plan leaks. Gather these before you buy or install anything, because the writing is the part people skip and the part first responders need.
- A written elopement plan. One page. Name every exit, who is responsible for which opening, who calls 911, and what information they get. Give a copy to anyone who cares for your child.
- An exit inventory. A notebook or phone note listing every door, window, gate, and hatch, each with the date you last secured it. Photos help; memory lies.
- Hardware for the points of exit: a secondary deadbolt or thumb turn mounted above your child’s reach, a top-of-the-door sliding door bar, window limiters or screw-in window guards, and a self-latching gate latch for any fence.
- Alerts. Door alarms on exterior doors, window sensors on any reachable opening, and a phone or panel that pings you. A chime you can hear over a running dishwasher beats a siren that startles everyone.
- Furniture anchors and basic tools. An anchor kit, a screwdriver or drill, and the willingness to relocate a dresser.
- Visual supports. Red STOP decals on exterior doors, a first-then board, and a simple social story about who goes outside and who stays inside.
- Identification. A wearable ID bracelet or card with a caregiver’s current phone number, plus a recent photo and any medical notes, because a nonverbal child cannot explain themselves to a stranger.
- A tracking layer. A wearable GPS tracker and the account details, plus a charged phone that receives its alerts.
- Emergency contacts. Your local police non-emergency line, a backup family member, and your child’s school or daycare.
- Water safety. Anything at a pool, pond, or neighbour’s yard gets the same attention as a front door, and that includes a water safety class if your child is verbal enough to benefit from one.
Add the fire safety answer to that list before you install anything heavy. Secure doors, but never trap an adult who needs to leave in a hurry. Use egress-capable hardware that can be opened from the inside without a key, keep keys where a panicked adult can find them, and leave a window or door usable from the child’s bedroom. Your local fire code governs this, so check it rather than guessing.
Step-by-Step: How to Childproof a Home for a Child Who Elopes
Step 1: Identify Every Possible Exit Route
Walk your home the way your child does, from inside, at their height. Start at the front door and go room by room.
Cover the obvious openings: front door, back door, side door, garage door, sliding patio door, the door to any basement or crawlspace, and the pet door if you have one. Then the ones people miss. Windows in bedrooms, bathrooms, the basement, and the upstairs hallway. The wide first-floor window behind the couch. The second-floor window above the stair landing. Any window low enough to reach from a chair, a table, a crib rail, or a climbing shelf.
For each opening, write two things. How the child gets through it, and what is immediately outside it. That second note is the one that changes your priorities, because a window that opens onto a porch facing the street is a different problem from a window that opens into a fenced side yard.
Then record what happened after the last escape, if there was one. Time of day, direction of travel, what the child went toward, and what was happening ten minutes before. Most families find a pattern in the notes, and the pattern is usually a trigger rather than a time of day. Once you have the list, date it. This becomes your layer checklist and your plan.
Step 2: Create Layers of Protection at Doors and Windows
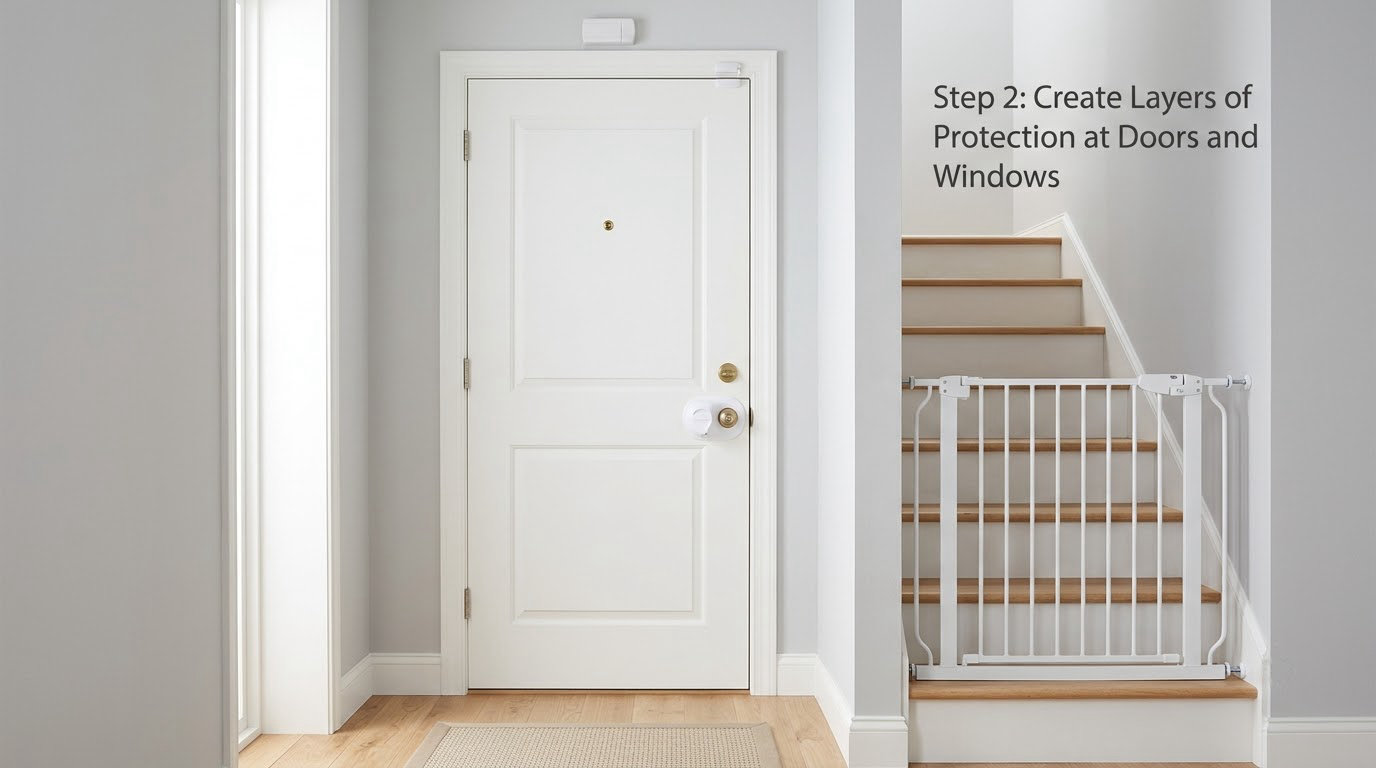
For doors, use at least two things at once: a lock a small child cannot operate, and an alarm that tells you it moved. The second layer is what saves you when the first one fails, which it eventually will with a determined child and a spare hairpin.
Move the lock, not just the child. A secondary deadbolt or sliding bolt mounted high on the frame, a top-of-the-door bar on a sliding door, and a chain or latch on the interior side of any door you need to open quickly for a visitor. Outward-swinging hinges on exterior doors are worth considering if you can find a carpenter.
For windows, limiters and screw-in guards beat most improvised solutions. Removable window screens are not a security measure; the failure mode parents describe most often is a child leaning on the screen until the frame releases it and the whole unit leaves. Screw-in guards hold the sash in place. Test any guard yourself by pushing the window outward with your full body weight before you trust it.
Add a visual layer too. Red STOP decals on the outside of every exterior door are cheap, and SPARK for Autism highlights a parent whose family put them on every door leading outside as a standing reminder of the rule.
| Safeguard | What it stops | What it does not stop |
|---|---|---|
| Secondary deadbolt or thumb turn | A child who turns or lifts the existing handle | A child who has learned the new mechanism, or an adult in a hurry |
| Door alarm | Silent openings; buys you seconds of warning | The escape itself, if you are not in earshot |
| Screw-in window guard | A child pushing the sash outward or climbing through | Climbing out of a second-floor window to a lower roof or balcony |
| Top-of-door sliding bar | Sliding doors, the most common adult-laid exit | A door someone else propped open for a delivery |
| Self-latching gate latch | A child walking out of a fenced yard | A child who has learned to lift the latch |
| GPS tracker | Losing time once the child is gone | Preventing the escape, or telling you which direction they turned |
Two habits matter more than the shopping. Test the alarm monthly by opening the door from inside, and never leave an exterior door propped. In most households the propped door is the whole incident, and no lock on the market fixes it.
Step 3: Secure the Yard, Garage, and Outdoor Areas
Water is where the worst outcomes happen, and it is often a neighbour’s yard, a pool cover, or a retention pond. Fence the perimeter, use a self-closing, self-latching gate, and add a door alarm to any pool gate if your child can reach it. A pool cover is not a fence, and neither is a fence with a climbing chair next to it.
Walk the fence line looking for a weak point, then walk it again looking for something to climb: bins, a recycling container, a ladder, a tree, a picnic table, a dog house. Move the climbable item or anchor it. This is the step that gets skipped and it is the step that appears in every real escape story.
The garage deserves its own pass. Keep the vehicle in the driveway or keep the key fob out of reach, store tools and chemicals locked up, and test the garage door sensor by walking under it. Some children figure out the wall button and the remote inside the house.
Then think beyond your property line. Introduce yourself to the neighbours on the street your child is most likely to run toward, and tell them what to do: do not chase a running child into traffic, do not argue, call the parent, stay with the child if it is safe. A neighbour who has met your child and has your number is worth more than any device.
Step 4: Make the Home Hard to Leave During High-Risk Times
Most escapes cluster around transitions: a refusal to end a preferred activity, a change in routine, a cancelled plan, an early wake-up, or a second bad night of sleep. Physical safeguards matter most in exactly these windows, so plan the windows.
Before a known transition, give a warning, a first-then board, and a finished cue that means the same thing every time. Lower the number of demands in the hour around a change. Put a quiet space near the exit door, not across the house, so a child working through distress has a place to stop that is not the door itself. Keep one adult free to stay with the child one-on-one rather than cooking, cleaning, and supervising at once.
If your child is heading for the door, block calmly, low, and without a lecture. A chasing adult loses a footrace with a runner, so position yourself between the child and the exit rather than following at full speed. If the noise is the trigger, you have a real alternative to alarms: a freeze door, a visual stop sign, and a predictable waiting routine that replaces the sudden sound. We wrote about the noise-driven version of this in our guide to how to handle autism meltdowns at home.
Step 5: Use Alerts, Tracking, and Communication Tools
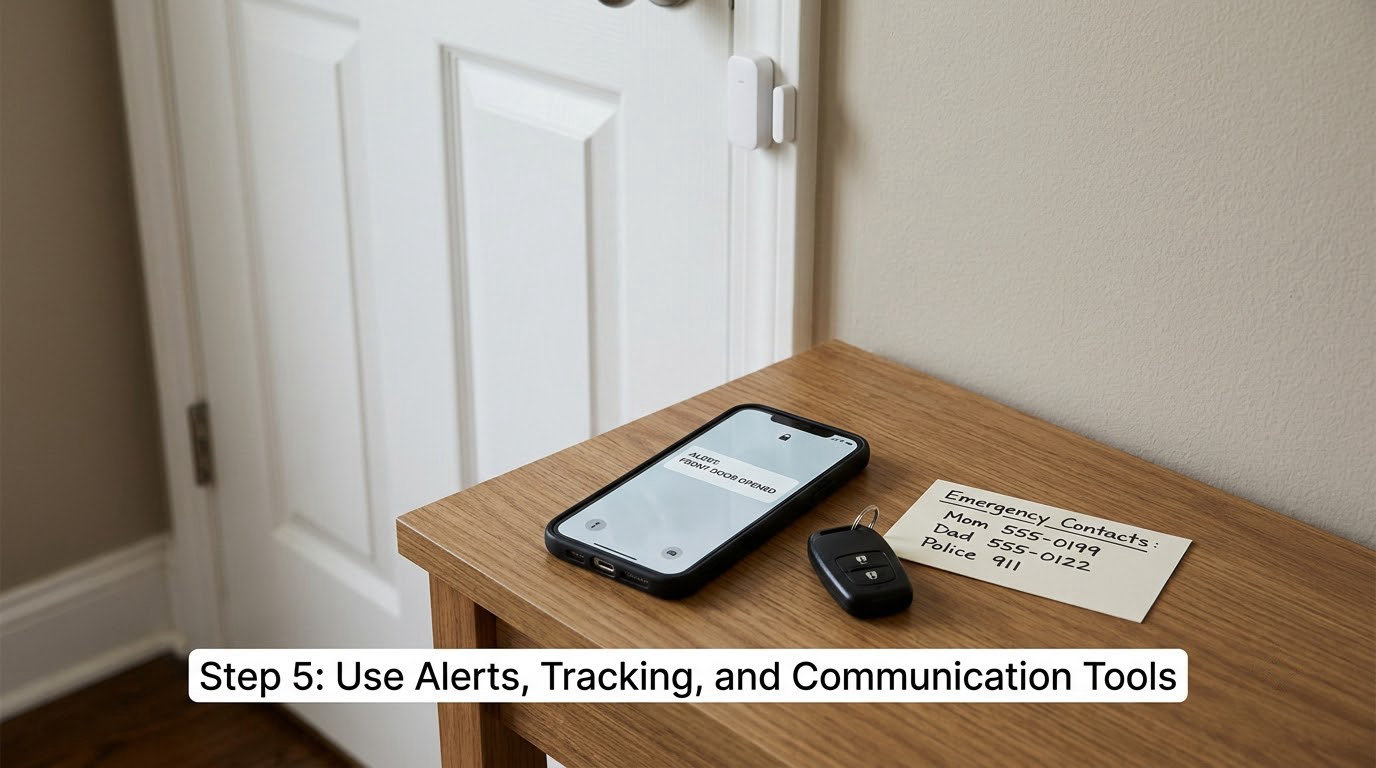
Alerts are the layer that buys you time. Put a sensor on every exterior door, on windows a child can reach, and on the gate. Choose a system that notifies a phone as well as sounding locally, because the adult on duty is often in another room with a vacuum running.
Tracking handles the case prevention does not. Purpose-built wearables such as AngelSense or Project Lifesaver are built for a child who will not answer a phone; a Bluetooth tracker on a lanyard, a shoe, or a backpack works for older children who stay on it. A tracker does not stop an escape, so treat it as the layer after the alarm, not instead of it.
Test tracking before you depend on it. Charge the device, confirm the account works, check that a second caregiver can log in, and walk it around the block to see how quickly it updates.
Then do the paperwork that makes a search easier. Register your address with Smart911 through your local police department so 911 calls from your phone bring up your floor plan, medical notes, and the list of people to call. Put ID on the child: a bracelet or card with a caregiver’s number, a photo, and the fact that your child is nonverbal and may not respond. Share the elopement plan with the school, the daycare, the after-school programme, and the grandparents, and tell the school what happens when your child runs at school so their response matches yours.
Step 6: Teach and Practice a Safety Plan
Children who can ask for what they need have a way out that does not involve a door. Functional communication training is the direct replacement for elopement: teach a break card, a sign, a word, or a sound that means I need space, and practise it daily when the child is calm, not during the crisis.
Add the other half: coming back indoors. Practise returning indoors from outside as a short, boring, predictable routine, and praise the return heavily every single time. Practise with role-play, with the alarm, with the social story on the fridge, and with different adults so the rule does not belong to one person.
Keep expectations realistic. A child in full distress will not follow a rule they have practised a hundred times, and expecting that turns a safety plan into a source of shame. Practise for the calm ninety percent, and treat the distress ten percent as a job for the physical layers.
Step 7: Rehearse an Elopement Response and Review the Plan
Write down the first five minutes before you need them. When you find the house empty, a rehearsed plan is the difference between a search of your own street and a search of the whole neighbourhood.
Split the roles. One adult stays with siblings and pets. One goes to the last place the child was seen, because many elopements continue in the same direction for a block or two. A third adult, if you have one, calls 911 immediately rather than after a ten-minute search, because a nonverbal child who will not answer their name and will not give information to an adult is a low-priority description unless someone gives the responders context.
When you call, be ready with the basics: age, nonverbal status, whether the child responds to their name, a recent photo, what they were wearing, what happened just before, and any medical conditions. That matches what responders wish they were told and shortens the first minutes.
Review the whole plan quarterly and after any incident. Also review it as your child grows, because that is when locks fail. A three-year-old cannot defeat a top-of-the-door bar and a seven-year-old sometimes can. When a new skill shows up, add the next layer rather than feeling like you failed.
Common Mistakes
Trusting one device. An alarm on the front door leaves the sliding door, the bathroom window, and the upstairs hall completely open. Every safeguard here works in a stack, and the second layer is the one that saves you when the first one fails.
Improvising barriers. Broomsticks wedged in a door handle, a mattress under a window, a rope tied to a door knob. These are temporary measures that fail at the worst moment and can block adult escape. Use hardware rated for the job, and if you are mounting guards or hinges, follow the manufacturer’s instructions and use the specified anchors.
Forgetting windows and water. Parents in the communities I read described escapes through a living room window and a playroom window, and one child who pushed an entire screen unit out of the frame. Drowning remains the deadliest outcome. Treat water hazards with the same seriousness as the front door.
Punishing the child. Shame, scolding, or removing something they love after an escape teaches a child that being caught is worse than leaving, and it does nothing about the route they used. Respond to the escape, address the function of the behaviour with a professional if you can, and keep the consequence of coming back positive.
Inconsistent responses across adults. If the grandparent lets them out the back and the parent stops it at the front, the child learns there is a person, not a rule, and tests the easier adult next time. The rule has to belong to the house, which means every caregiver, every visitor, and every babysitter gets briefed.
Not testing the equipment. A dead battery, a sensor that was never paired, a lock installed on the wrong hinge side. Set a monthly five-minute check: open each door from inside and confirm the alarm, push each secured window, and check the tracker charge. A plan you have not tested is a hope, not a plan.
Using a tracker as a babysitter. A GPS location shows you where a child is. It does not show you whether they are frightened, injured, or halfway into a pond. Technology locates, people supervise.
And the one nobody wants to hear: locking a child inside carries a real emotional cost. Siblings notice, and so does the child. Talking to your family about why the doors are secured, and about the day that changes, is part of keeping the plan sustainable rather than something you quietly avoid.
Frequently Asked Questions
How do I help a child who elopes?
Start with the last escape, not the theory. Note the trigger, the time, and the direction of travel, then secure that exact route before anything else. Add a communication replacement such as a break card so the child has a way to ask for what they need. Teach returning indoors through short daily practice, keep the response calm and consistent, and review the plan with your child’s team.
What is the 6 second rule in autism?
It is a rule of thumb used in behavioural strategies, not a diagnostic term. After you give a direction or offer a choice, wait about six seconds before repeating it, adding a prompt, or moving on, so a child processing slowly has time to respond on their own. Many parents find that repeating instructions immediately is what leads to the demand being ignored, and eventually to a meltdown or an attempt to leave.
How do I make my house safe for toddlers who elope?
Walk every opening from inside at your child’s height: front and back doors, sliding doors, garage, basement, and every reachable window, including ones behind furniture. Secure doors with a lock above reach plus an alarm, and windows with limiters or screw-in guards, since removable screens can be pushed out. Fence the yard with a self-latching gate, anchor or remove climbable furniture, add ID to your child, and keep water hazards closed off.
Does a GPS tracker work for a nonverbal child?
Yes, and it is often the layer that shortens a search. A nonverbal child cannot pick up a phone, answer their name, or describe themselves, so a purpose-built wearable that alerts you to location changes works without any input from them. Keep it charged, give a second caregiver login access, and test it outdoors. It locates a child, but it does not replace supervision or a rehearsed response.
Do door locks and alarms make my child feel trapped?
Some children react badly to the sound of an alarm, and for a child who hates noise a freeze door, a stop sign decal, and a predictable waiting routine can do more than a siren. Physical barriers are still the foundation because a child in distress is not a reliable decision maker. Choose alarm tones you can test, keep egress-capable hardware that adults can open quickly, and never block adult escape routes to solve the problem.
What should I do in the first five minutes after my child leaves the house?
Send one adult to the last place the child was seen, keep another with siblings and pets, and call 911 from the first minute rather than after a long search, especially if your child is nonverbal and will not answer. When you call, give age, clothing, a recent photo, whether the child responds to their name, and what happened just before. Many children keep moving in one direction, so the first street matters more than the search radius.
Conclusion
Start where the risk actually is, not where it is easiest to start. Map every exit, secure the openings your child uses most, add an alert and a way to find them, and rehearse the five minutes after a door opens. Environmental safety, clear communication, and close supervision work together. Any one of them on its own leaves a gap, and the parents who stopped being afraid are the ones who stopped looking for a single solution.