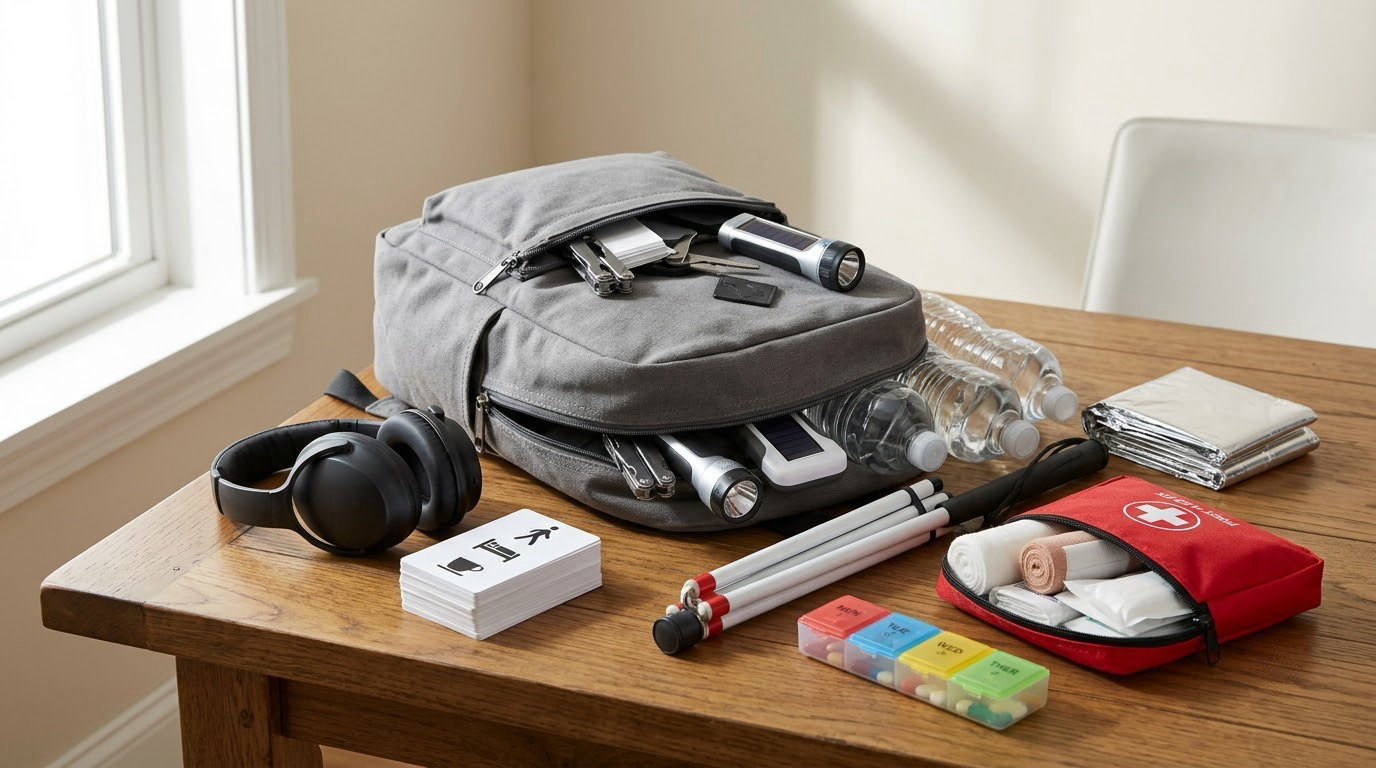
Emergency preparedness for families with disabilities means planning, stocking, rehearsing and documenting what your household needs before a fire, storm, outage or shelter situation, with extra attention to the sensory, communication, mobility, medical and power-dependent equipment needs of the person in your family who has a disability. A generic kit assumes everyone can hear an alarm, read small print and walk out unaided. Building the first version takes about two hours, and the rest can be done in stages.
Most of the checklist guides out there stop at water, food and a first-aid kit. That leaves out the things that actually derail a family: the refrigerated medication, the powered wheelchair charger, the child who cannot say what hurts, the caregiver who is the only person who can calm them down.
Table of Contents
- What You Need for Emergency Preparedness for Families with Disabilities
- Step-by-Step: Building Your Plan in Seven Steps
- 1. Map the Risks Your Family May Face
- 2. Create a Contact and Backup-Plan System
- 3. Prepare Medical, Sensory and Communication Information
- 4. Build a Disability-Friendly Emergency Kit
- 5. Plan Evacuation, Shelter and Transportation
- 6. Plan for Power, Heat, Food and Water Interruptions
- 7. Practice and Update the Plan
- Common Mistakes to Avoid
- Frequently Asked Questions
- What should a family with disabilities include in an emergency kit?
- How can I prepare my child for an emergency if they cannot communicate verbally?
- How should medications be stored during a power outage?
- What if an emergency shelter is not accessible for my child?
- How do I make emergency information easy for substitute caregivers to use?
- How often should families update their emergency preparedness plan?
- Conclusion: Where to Start With Your Emergency Plan
What You Need for Emergency Preparedness for Families with Disabilities
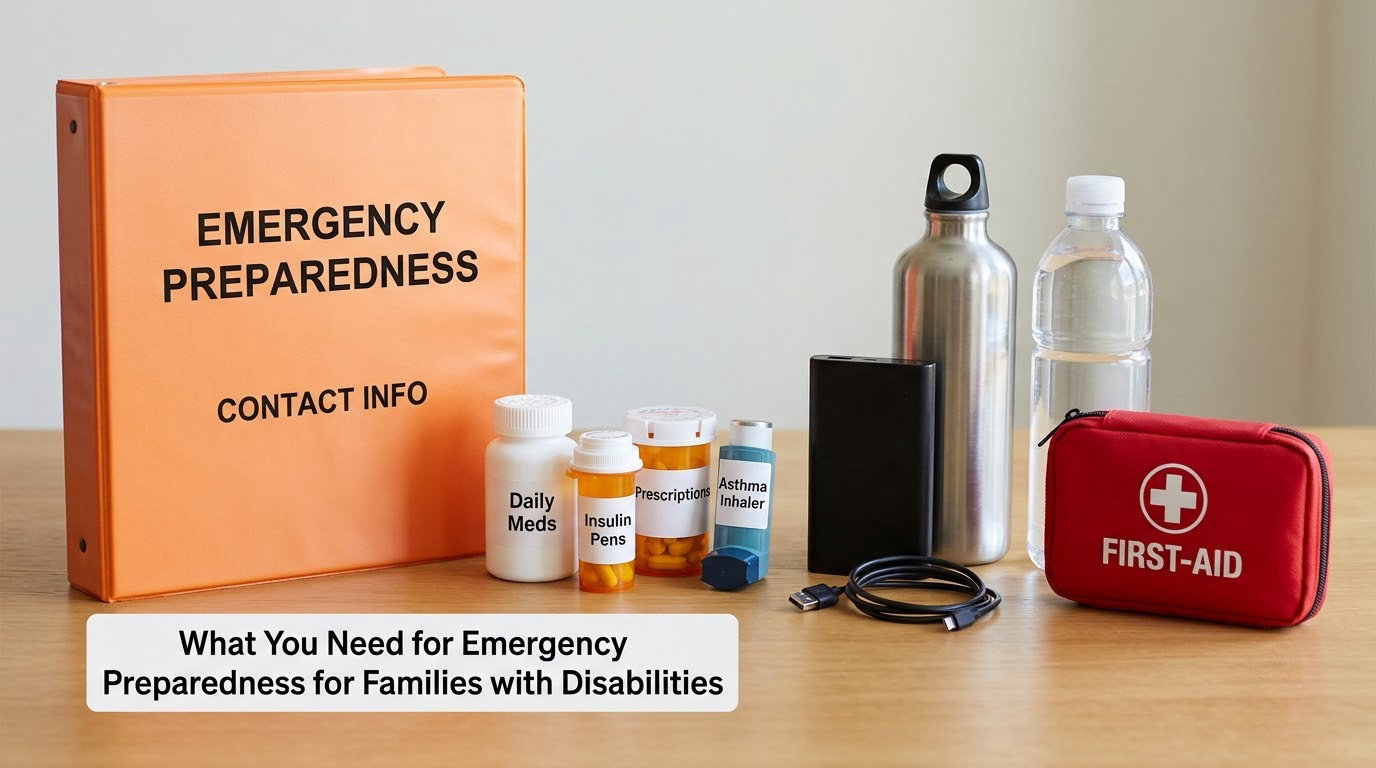
Before you buy anything, gather what you already own. Most families find they can build a workable plan from documents and equipment they are already using, plus a small number of additions. Work through these groups and tick items off as you go.
Documents and identification
- Copies of insurance cards, Social Security or Medicaid cards, and state identification for every family member
- Birth certificates, adoption or guardianship papers, and custody documents
- Immigration or citizenship paperwork if anyone in the home is not a citizen
- A one-page list of every medication, dose, pharmacy and prescribing doctor
- School records, including any IEP or 504 plan, plus emergency contact cards
- Advance directive, health care proxy or power of attorney paperwork
- Deed or lease, and a record of where the family will stay if the home is unusable
Contacts and communication
- One out-of-state contact who can act as the single point for the whole family
- At least two backup caregivers, with their phone numbers and hours
- Names and numbers for the doctor, pharmacy, home health aide and personal care attendant
- Names and numbers for the school, daycare and after-school program
- Landlord or property manager, and the local emergency management office
- A communication card or note in plain language explaining how your family member communicates
Medical and power-dependent equipment
- Enough medication for at least a week, rotated so nothing expires on the shelf
- Backup batteries or an alternate power supply for ventilators, oxygen concentrators, feeding pumps and powered wheelchairs
- An insulated medication cooler and a thermometer for refrigerated or frozen medication
- Spare parts your equipment manufacturer lists, such as wheelchair tire tubes, joystick covers and hearing aid or cochlear implant batteries
- Gloves, a blood pressure cuff, a pulse oximeter and a thermometer if your family uses them routinely
- Enough tubing and supplies for feeding or ostomy care for the planned duration
Sensory, communication and comfort items
- A sensory bag with noise-cancelling headphones, earplugs, a weighted lap pad or blanket, fidgets and a chewy item
- Visual supports: a printed evacuation routine, a picture schedule, or laminated cards showing steps
- A laminated communication card or alphabet board, plus a pen and small notebook
- Headphones that let your family member hear an alarm or announcement while staying protected from loud surroundings
- Familiar comfort objects, such as a favorite blanket, a stuffed animal or a teething chew that calms without needing to be explained to a helper
- Service animal documentation and a backup care arrangement for the animal
Food, water and everyday supplies
- Water for three days per person, plus the amount your family member’s care instructions call for
- Food that needs no cooking and no refrigeration, packed in the family’s usual brands and textures
- Special diet or allergen-safe food in extra quantity, since substitutes are hard to find in a shelter
- Manual can opener, paper plates, utensils that are easy to grip, and a small hard-sided cooler
- Backup batteries in several sizes, a flashlight, and a battery or hand-crank radio
- Sanitation supplies: wet wipes, diapering supplies, a squeeze bottle if needed, and a plastic bag for waste
- Money in small bills, a spare key, and a list of what to grab if you have under a minute
Step-by-Step: Building Your Plan in Seven Steps
1. Map the Risks Your Family May Face
Start with a ten-minute look at your local hazards, then rank them. A family in a flood zone has different priorities from a family on a wildfire edge, and both differ from a family whose biggest risk is a house fire with two minutes of warning.
Ask what has actually happened in your county in the last decade: flooding, wildfire, tornado, ice storms, extreme heat, a public health emergency, or a prolonged power outage. Then ask which of those require a different kind of preparation. Floods mean vertical evacuation and a rule about driving into water. Extreme heat means cooling and power. A fire means a fast grab-and-go bag, not a full pantry.
Write the ranking down. Most families end up with one slow-moving risk and one fast one, and the kit for each looks different.
2. Create a Contact and Backup-Plan System
Choose one out-of-state contact as the family hub. Local phone lines fail first in a wide emergency, and a relative several states away is often the only person everyone can still reach.
Then build the backup list. For each person, note their name, role, primary phone, secondary phone and the hours they are available. Include your child’s teacher, the school office, your personal care attendant, and the aide who comes on weekends, because those are the people who may have your child when you do not.
Make the list work without a smartphone. Print it, laminate two copies, and keep one in the go bag and one in the binder. If a caregiver does not use a phone, write the same information on a card in large print with a checkbox for the times they are reachable.
Registration also matters here. Many counties maintain a disability or special needs registry that lets responders know who lives at your address and what support you need. Ask your county emergency management office whether such a list exists and how to be added.
3. Prepare Medical, Sensory and Communication Information
Build a single page that a substitute caregiver or a responder can pick up and act on. One page is the constraint. Anything longer gets skimmed.
Include the person’s name and pronouns, primary language, diagnosis in plain words, and the three things a helper must know first. Then list every medication with dose, timing and pharmacy, plus allergies and what to do in an emergency dose. Add hearing or vision status, communication method, and what to do if the person cannot find words.
Finish with mobility notes: wheelchair or walker, whether the person transfers independently, stairs or no stairs, and any assistance needed for toileting. Add sensory notes in concrete terms, such as noise sensitivity, fluorescent light sensitivity, or a meltdown response, and one de-escalation sentence that works. Finish with the out-of-state contact and the two backup caregivers.
Print several copies. One lives in the go bag, one in the binder, one goes to the school, and one travels with the person who is most likely to be with them.
4. Build a Disability-Friendly Emergency Kit
Build one kit per person, not one household kit. In a house fire the family splits up, and a single bag on one shoulder means somebody leaves with nothing.
For each person, pack medication, water, food, a change of clothes, identification, a copy of the one-page information sheet, and the sensory or communication items that person relies on. Add their specific assistive device supplies: spare wheelchair tubes, extra AAC batteries, cochlear implant or hearing aid batteries, or a spare cane tip.
Then stage the kits where they can be reached in seconds. One by the front door, one by the bed, one in the car. Label the outside of each with the person’s name in large print, and add a strap or handle. A bag that fits a walker, wheelchair or scooter pouch is worth having even if it looks redundant.
Keep a master list of everything that went into the kits, with quantities. That list is what makes refilling a ten-minute job rather than a two-hour rebuild.
5. Plan Evacuation, Shelter and Transportation
Walk the route yourself, in a powered chair if you use one, and time it. Note where a curb cut is missing, where a door is too narrow, and where a steep ramp will be hard going in wet conditions. Then write a second route in case the first is blocked.
If you live above the second floor in a building, ask the building manager where the area of refuge is and who is authorized to use the elevator during a fire. Write the answer down. A written authorization, signed and kept in the binder, saves an argument at the worst possible moment.
Plan transportation in two layers: who drives you, and what you do if the vehicle will not start. If your family member cannot be transferred into a car seat, budget extra time for a transfer and keep the transfer routine familiar. If you use a service animal, note that the animal goes with you and needs a water bowl, food, waste bags and a backup sitter.
For shelters, decide your fallback before you need it. Many general shelters will not have a quiet room, backup power for a medical device, or a fridge for medication. Identify at least one accessible shelter and one private backup, such as a motel a short drive away, and check in advance whether the shelter accepts service animals and can power medical equipment.
6. Plan for Power, Heat, Food and Water Interruptions
Write down how long each device runs on its battery, and set an alarm for when that battery is half gone. Know the answer for your ventilator, oxygen concentrator, feeding pump, powered wheelchair and stair lift. A concentrator that runs eight hours is a very different problem at 2 a.m. than at 2 p.m.
Keep refrigerated medication in a validated cooler with a thermometer, and know the temperature range your pharmacist gave you. If the cold chain breaks, call the pharmacist or manufacturer before using the medication, and have the backup supply ready. Never improvise with a cooler that has no thermometer.
For food safety, plan for what you can eat without cooking. Ready.gov guidance treats water as the first priority, then food that needs no cooking, and a plan for safe storage when the fridge loses power. Keep a thermometer in the fridge so you can tell whether food is still safe rather than guessing.
For heat and cold, plan two ways to stay safe if the power stays out: the coolest or warmest room in the house with the right clothing or blankets, and a backup location. Never run a generator indoors, and never connect one to a home’s wiring through anything except a transfer switch installed by a licensed electrician.
7. Practice and Update the Plan
Run the drill twice a year, and again after any change to the plan, the address, the medication, the equipment or the caregiving schedule. Two practices a year is the widely published recommendation, and the second one matters more than a perfect first one.
Keep the drill realistic: announce the alarm, let everyone act, and time the whole thing. Include the people who help, such as a personal care attendant, and tell your child’s teacher that a drill is happening so the school does not call you mid-practice.
Then close the loop. Say out loud what worked and what was missing, add the missing item, and date the revision. Set the next review in your calendar, using the date you reviewed it in October 2026 as the anchor, and treat a new diagnosis, a medication change, a new device, a new address or a new caregiver as an automatic trigger for a fresh look.
Common Mistakes to Avoid
Almost every plan I see fails on the same five points, and each one has a straightforward fix.
Keeping every supply in one place
One central kit is elegant and fragile. If the fire starts in the kitchen, or the evacuation route does not pass the closet where the kit sits, the plan fails at the first step. Fix: build one go bag per person and stage them at two exits plus the vehicle.
Making a plan only the caregiver can read
A plan kept in your head or in an app on your phone is gone the moment your phone is gone, wet or dead. Fix: print the one-page sheet, laminate it, and place copies in the bag, the binder, the school folder and the car.
Forgetting sensory and dietary needs
This is the most common gap in published checklists, and the one autistic families raise most often. A shelter that serves a mystery casserole is useless if your child eats only four foods and reacts to fluorescent lighting. Fix: pack extra familiar food, and write the sensory triggers and one de-escalation sentence on the information sheet.
Skipping practice because everything looks fine
Plans drift out of date silently. Medication changes, batteries die, a device gets swapped, a new aide starts. Fix: calendar two drills a year with a ten-minute supply check attached to each one.
Assuming a shelter will meet every need
General shelters are designed for a short stay with the general population. They may not have backup power, refrigeration, a quiet space or a private changing area. Fix: identify a backup location in advance and pack a shelter intake card with your child’s needs written plainly enough to hand to a stranger.
Frequently Asked Questions
What should a family with disabilities include in an emergency kit?
Start with a per-person go bag holding a week of medication, identification, a copy of the one-page health summary, water, no-cook food and a change of clothes. Add the disability-specific items your family member needs: spare wheelchair or AAC batteries, hearing aid or cochlear implant batteries, a sensory kit, a communication card, and a cooler with a thermometer for refrigerated medication. Keep a master list of everything packed so refilling the bags stays quick.
How can I prepare my child for an emergency if they cannot communicate verbally?
Build a laminated communication card that names how your child communicates, what they need when overwhelmed, and how to get their attention. Pair it with a picture or alphabet board and a pen in the bag. Tell caregivers to use short, literal sentences, one instruction at a time, and to ask about a yes-or-no answer rather than an open question. Practise handing over the card during drills so using it feels ordinary.
How should medications be stored during a power outage?
Move refrigerated or frozen medication into a validated cooler with a thermometer, following the temperature range your pharmacist gave you, and keep the backup supply in the same cooler. Never guess at temperature. If the cold chain breaks, call the pharmacy or the manufacturer before using the medication and switch to the backup supply. Keep the medication list and pharmacy number on the same one-page sheet so a substitute caregiver can act without you.
What if an emergency shelter is not accessible for my child?
Ask ahead rather than at the door, and identify a backup location such as an accessible motel or a faith-based facility with private rooms. Bring a written shelter intake card listing your child’s mobility, sensory and medical needs, plus a service animal note. If the shelter cannot meet a need, ask for a supervisor and name the specific accommodation, such as a quiet room or a fridge for medication, rather than describing the problem in general terms.
How do I make emergency information easy for substitute caregivers to use?
Keep it to one page, at a large readable font, and write instructions as actions rather than descriptions. Include the daily medication schedule, allergy and sensory triggers, how your child communicates, what a meltdown looks like, and one de-escalation sentence that works. Put a backup phone number and the pharmacy on the same page, then laminate copies and leave one with every regular caregiver, the school, and the emergency kit.
How often should families update their emergency preparedness plan?
Review the full plan twice a year, tied to your household drill, and immediately after any change in diagnosis, medication, equipment, communication method, address, caregiver or school placement. Check the go bags quarterly for expired medication, dead batteries and missing comfort items. Replace drinking water every six months and confirm the out-of-state contact is still reachable, since numbers go out of date quietly.
Conclusion: Where to Start With Your Emergency Plan
Four actions carry most of the weight, and none of them takes more than an evening. Write the one-page information sheet and print four copies. Build one go bag per person and stage them at two exits and in the vehicle. Choose an out-of-state contact and two backup caregivers, then give the information to the school, the sitter and the aide. Finally, run one realistic drill, time it, and note what was missing.
Emergency preparedness for families with disabilities works when other people can carry it without you, and when your family member’s needs travel with them instead of staying in your head. Start small, keep the dates in the calendar, and update the plan every time something in your family’s care changes.