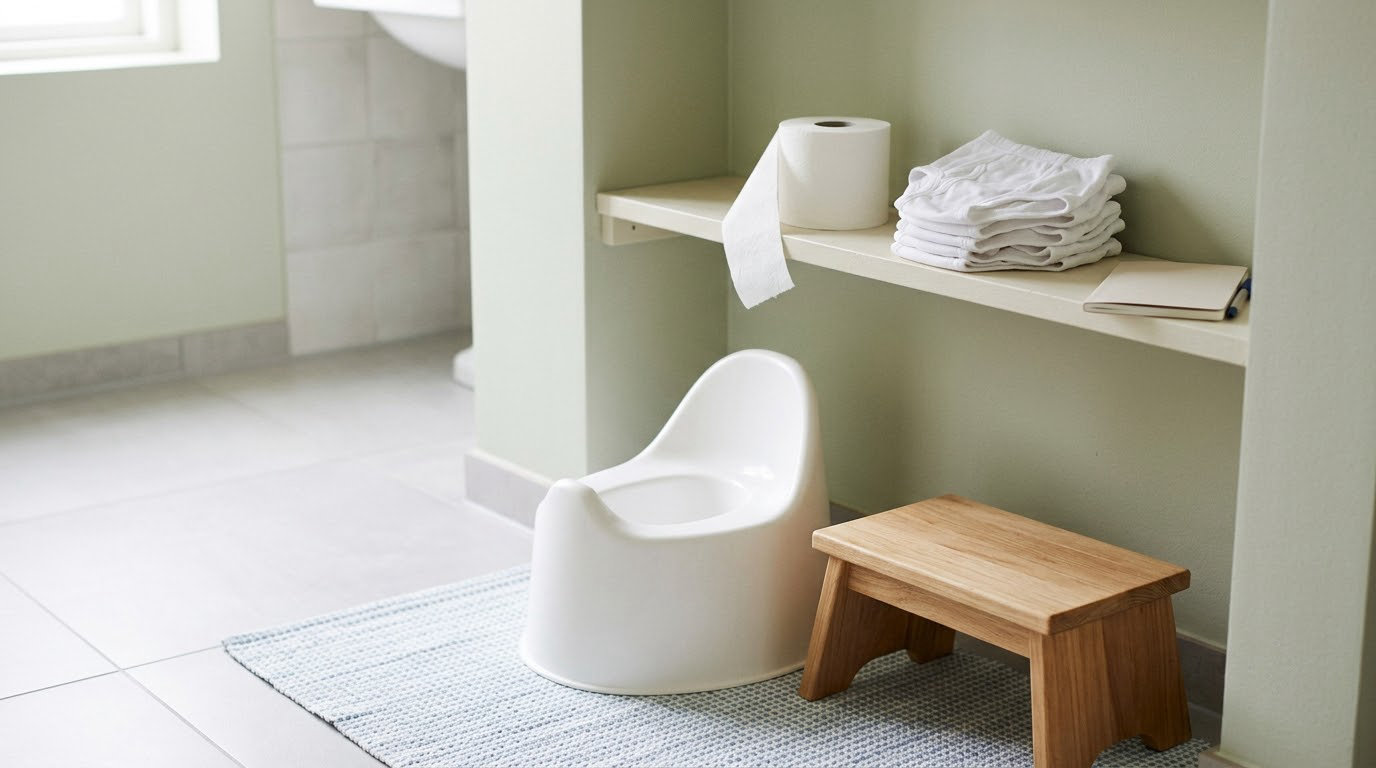
There is no reliable age to wait for, and a parent searching for how to toilet train an autistic child will meet a dozen timelines in a dozen posts. The honest answer: confirm readiness first, then build a slow, visual, low-pressure routine rather than a deadline. You make the bathroom physically comfortable, sit on a predictable schedule, and reinforce every attempt within seconds. Most autistic children take months rather than days, and some take longer with a break in the middle. Nothing in this guide asks you to rush or punish.
I have talked with a lot of parents who felt behind because a classmate was trained by age two, or whose child had already been through two failed attempts. The pattern repeats: the problem is almost never the child. It is a routine that was never adjusted for sensory needs, communication differences, or the fact that a full bladder is genuinely hard to feel from the inside.
Below is the plan I would walk any family through, in the order I would walk them through it.
Table of Contents
- What You Need to Toilet Train an Autistic Child
- Step-by-Step
- Common Mistakes
- Frequently Asked Questions
- At what age should an autistic child start toilet training?
- How can I toilet train a nonverbal autistic child?
- What if my autistic child is afraid of the toilet?
- How long does toilet training usually take for an autistic child?
- Should I punish my child for bathroom accidents?
- When should I ask a pediatrician or therapist for help?
- Conclusion
What You Need to Toilet Train an Autistic Child
You need very little. The tools below simply make the process predictable and physically comfortable, which is most of what a child needs to learn a new routine.
- Readiness, not a birthday. More on the signs below, because starting before your child is ready is the single biggest reason attempts stall.
- A child-sized toilet or a training seat that sits on the adult toilet with feet supported. A step stool that does not wobble matters more than most parents expect.
- Clothing that comes off fast. Elastic waistbands, or loose pants with snaps, so nothing has to be pulled over a head during a melt-down.
- A visual schedule or routine card you can keep in the bathroom, showing the order of steps. For some children a social story explaining the whole thing beforehand works even better.
- A small reward system. A sticker chart, a token board, or one specific privilege the child actually values.
- Adaptive supports: a padded seat, noise-reducing headphones for the flush, a privacy cover, softer lighting, or a small stool for foot support. Whatever removes an obstacle you have already identified.
None of this requires spending much. If you are already managing the cost of larger diapers or pull-ups, ask your insurer or your state Medicaid office about coverage; in the United States, Medicaid and CHIP often cover incontinence supplies when a clinician documents them as medically necessary.
Step-by-Step
The order matters. Each step gives the child something predictable to hold onto before the next demand arrives, and the whole sequence is designed to be started, paused, and restarted without losing ground.
Check Readiness Before Beginning
Readiness beats age, every time. Two-year-olds who are outgrowing diapers are frequently not ready, and five-year-olds with strong signals may be. Chronological age is a weak predictor here, and so is being small enough in size.
Physical readiness looks like: staying dry for roughly an hour to an hour and a half at a stretch, being able to lower clothing and raise it again, staying balanced on the toilet or a training seat with feet supported, and telling you or showing you in some way that elimination is happening.
Communication readiness is different from language readiness. A child who does not speak can point, sign, use a picture card, show a device, or go rigid and hide. Pointing at the toilet and tearing off a diaper both count as signals.
Behavioral readiness means the child follows a simple routine with you, can move through a short transition without a major melt-down, shows some interest in the toilet or copies what other people do in the bathroom, and tolerates the sensory parts of being undressed near a toilet.
| Readiness area | What it looks like |
|---|---|
| Physical | Dry for an hour or more, stable balance with foot support, clothing comes off quickly |
| Communication | Any consistent signal: words, signs, picture card, device, gesture, going stiff |
| Behavioral | Follows a short routine, shifts between activities, shows curiosity about the toilet |
| Sensory | Tolerates the flush, the seat temperature, and being undressed without shutting down |
If you ticked three out of four, you can start. If the sensory row is empty, work on that row first with the steps below and begin training later.
Make the Bathroom Easier
This is where most gains come from, and it is boring work that pays off. Go through the room and remove whatever is bothering your child.
The flush is the top offender for many children. The sudden whoosh and the water swirling are loud and unpredictable. Offer noise-reducing headphones, practice flushing a few times before training begins while your child is calm, or simply teach the child to step away from the bowl before the handle moves. Automatic-flush and touchless faucets in public bathrooms deserve the same plan in advance.
Next, the seat itself. A cold plastic ring gets refused by plenty of autistic children. Warm the seat with hot water before each visit, or add a soft padded cover. Make sure there is no gap or splash, because a wet bottom ends more attempts than any power struggle does.
Light and sound are next. Bright overhead lights and echoing tile are hard on a child with sensory sensitivities. Use a softer bulb, keep a towel over the back of the door to cut the echo, or allow calming music. Put the visual schedule on the wall at your child’s eye level so they can see it while seated.
Clothing is the quiet saboteur. Loose bottoms that snap or pull straight down remove the undressing problem entirely. If your child wears something with a waistband that has to be pulled down past a bare bottom, that struggle can be the whole lesson.
Teach the Routine in Small Steps
Write the bathroom routine as a short list of observable actions and put it where your child will see it. Six to eight steps is usually plenty: notice the signal, go to the bathroom, lower clothing, use the toilet, wipe or clean, flush, wash hands, return to the routine.
Match how you teach it to how your child communicates. Some children learn best from watching you or a family member do the sequence. Others need photographs, step pictures, or a written list checked off one line at a time. Others respond to words, or to sign language, or to a single symbol on a communication device that means toilet.
Teach one step at a time and stay at that step until it is reliable. Practising six steps at once and correcting each one is how a routine turns into a negotiation.
Building the body-cue association is the part parents most want help with. Many autistic children report not noticing fullness until it is urgent or painful. You can work on this without asking them to report a feeling: use a consistent signal for going, connect that signal to a picture or a word, take your child to the toilet when you see the early signs, and mark the success. Over time the cue starts to mean something to them, even if they cannot yet put words on it.
Toilet training autism often progresses through this cue work before it progresses through words, so keep offering the signal even when the child is already verbal.
Practice Without Pressure
Put a chair or training seat in the bathroom, let your child sit clothed for a minute or two while reading, drawing, or playing, and say nothing about toileting. Repeat daily until the chair itself stops being a problem. Some families start with the child ripping and clattering toilet paper, because it turns the room into a place they enjoy first and a training site second.
When your child is willing to sit without clothes, work through this ladder slowly and stop at the last comfortable rung:
- Sitting on the seat fully clothed, for a minute.
- Sitting with a pull-up or underwear on, still fully clothed.
- Sitting with the pull-up on but lowered partway.
- Sitting with the pull-up completely down, still clothed underneath.
- Sitting with the lift-the-seat lid up, undressed, for as long as they tolerate.
- Sitting independently, with you a step away, and beginning to wipe or clean.
Each rung can take weeks. That is normal, and rushing to the next one is what turns a bathroom into a battleground.
Scheduled sits are the other half of practice. Choose two or three fixed points in the day, such as waking, after lunch, and before bath time, and sit on the toilet for three to five minutes with a timer your child can see. Use a drink they enjoy if drinking supports the routine. Keep it boring and repeatable rather than exciting.
During a sit, give one direction only: bottoms down. If you need to help, help. Do not add demands about wiping or flushing while the child is still learning to sit. If distress climbs, end the visit warmly and try again at the next scheduled time.
Reinforce Success and Independence
Reinforce the attempt, not just the outcome. Most toilet training plans reward a dry result, which teaches a child nothing on the days they cannot produce one. If you reward your child for walking into the bathroom, lowering their pants, sitting, and staying, then every visit is a win and the learning keeps moving.
Timing matters more than most parents expect. Deliver praise, a sticker, or the reward within a few seconds of the behaviour you want repeated. If the reward arrives ten minutes later, your child has no idea what it was for. Say what happened specifically: sitting the whole time, asking for the toilet, pulling pants down without help.
Keep a simple chart. Date, time, whether the sit happened, and whether it was successful, is enough. Charts tell you two things that guessing cannot: whether the plan is working at all, and whether a bad week means adjust the schedule or hold steady.
Then fade your help. Start by pointing to the schedule, then to the toilet, then by standing in the doorway, then by being in another room. Prompt fading is slow on purpose, because independence that does not survive a bad day is not independence.
Accidents get a flat, calm response. Say that it happened, that we will clean up, and nothing else. No sigh, no commentary about the clothes being wasted, no comment about a sibling, no sending the child away to think about it. Shame does not teach a skill, and for an autistic child it often adds a new fear to an already loaded bathroom.
If your child is outgrowing diapers faster than the training is progressing, a staged approach works better than either extreme. Move to underwear with pull-ups over the top, or keep the diaper on and take it down in the bathroom, then reduce the back-up layer over a few weeks. Families who did it this way report the change takes the pressure off everyone.
Reinforce Without Rewarding Accidents
Never give comfort, praise, or a treat for an accident. A parent who apologises to a distressed child is following a warm instinct and then teaching a confusing lesson. Clean up neutrally, use a fresh diaper or pull-up, and get back to the schedule.
Adjust for Plates, Reflux, or Sensory Needs
Many autistic children also have gastrointestinal problems, and constipation, reflux, and abdominal pain change everything about toileting. A child in pain will withhold, and a child who withholds can develop constipation that then becomes the reason toileting hurts. The cycle is common enough that parents often connect the two only after a clinician mentions it.
Keep a note of how often your child eliminates, whether there is straining or distress, and any change in stool texture, and bring it to your child’s pediatrician. If your child is withholding, refusing the toilet, or having accidents after they had been doing well, raise it with the doctor rather than pushing the plan harder.
Sensory processing differences, sleep problems, and mobility needs also affect readiness and access. A child who cannot lower clothing independently because of fine motor difficulty needs help, not pressure. A child whose fear of the bathroom sits alongside a specific sensory trigger, such as the sound of the fan or the brightness of the window, needs that trigger handled first.
Talk with your child’s pediatrician, occupational therapist, or a pediatric continence specialist if toileting is painful, if constipation is a concern, if your child has significant physical disabilities, or if you are at the end of what you can manage on your own. They can assess readiness and suggest adaptations tailored to your child. This guide is general information, not a diagnosis or a treatment plan for your child.
If your child is verbal and can express fear or pain, take it seriously. Bathroom avoidance that appears suddenly is worth a conversation with a clinician rather than a longer training schedule.
Common Mistakes
Most failed attempts share a handful of causes. Here is what to change.
- Starting before your child is ready. The fix: run the readiness checklist for two weeks and watch for consistency rather than one good day.
- Using punishment, shame, or comparison. The fix: remove the consequence entirely. Reinforce attempts, respond to accidents without comment, and never compare your child to a peer or sibling.
- Changing the routine every week. The fix: keep the same trigger, the same time of day, and the same reward for two to three weeks before judging the plan.
- Rewarding accidents or comforting them with treats. The fix: neutral cleanup, no reward, next scheduled sit as usual.
- Expecting a fixed timeline. The fix: judge progress in weeks and months of data, not days. Many children take a year or more, and progress can appear in small, uneven stretches.
- Relying on verbal instruction alone. The fix: pair every direction with a picture, a written step, a gesture, or a device symbol.
- Ignoring sensory barriers. The fix: treat the flush, the seat, the echo, and the clothing as problems to engineer out before you try again.
- Forced long sits. The fix: three to five minutes with a visible timer, ending early on request, and never held in place.
A few habits keep a long plan steady. Keep the visual schedule in the same spot. Mark the chart the same day every time, even when it is empty. Tell your child before the visit rather than surprising them. And expect setbacks from illness, travel, or a new school year without treating them as failure.
It is also fine to pause. A month off does not erase what your child learned, and restarting on the ladder where your child left off is usually easier than starting over. Parents who plan for a pause tend to keep going longer overall.
Take the pressure off yourself too. Changing a five-year-old’s diaper when it was supposed to have stopped two years ago is genuinely tiring, and the cost adds up.
Frequently Asked Questions
At what age should an autistic child start toilet training?
Start when your child shows consistent readiness signs, not at a set age. Most children who train without difficulty are ready somewhere between two and three, and autistic children often start later because of communication differences and sensory needs. Look for dry stretches of an hour or more, interest in the toilet, any consistent way of signalling elimination, and the ability to follow a short routine. Readiness beats age every time, and a five-year-old with strong signals is a better candidate than a two-year-old without them.
How can I toilet train a nonverbal autistic child?
Use scheduled sits rather than waiting for the child to tell you. Take them to the toilet at the same three or four points each day, reward the attempt, and keep a chart so you can see patterns. Teach one consistent signal, whether it is a picture, a sign, or a symbol on a communication device, and pair it with going to the bathroom. Many nonverbal children learn the routine through that fixed schedule rather than through language.
What if my autistic child is afraid of the toilet?
Work on the bathroom itself before you work on the toilet. Warm the seat, soften the lighting, offer headphones for the flush, and add foot support. Then use a slow ladder: sitting fully clothed, sitting with a pull-up lowered, then undressed. Let the child sit, read, or play in the bathroom for a few minutes a day with no demands at all. If the fear is sudden or intense, mention it to your pediatrician.
How long does toilet training usually take for an autistic child?
Months are normal and years are not unusual, especially for a child who started later, is nonverbal, or has sensory differences. Judge progress by weeks of charted data rather than by the calendar: a child who sits on schedule, asks for help, and stays for the full timer is learning even on the days there is no result. Consistent sessions matter far more than speed, and a planned break does not erase earlier progress.
Should I punish my child for bathroom accidents?
No. Punishment does not teach a skill, and for an autistic child it usually adds fear to a bathroom they may already find difficult. Respond with a flat, calm cleanup, no commentary, and return to the schedule. Also avoid rewarding an accident with comfort or a treat, which can accidentally reinforce it. If accidents are frequent or start after a good stretch, note the pattern and mention it to your pediatrician, because pain or constipation is a common hidden cause.
When should I ask a pediatrician or therapist for help?
Ask if toileting is painful, if your child is withholding or straining, if constipation shows up after training begins, if accidents start suddenly, or if your child has significant physical, sensory, or mobility needs. An occupational therapist can advise on clothing, positioning, and bathroom access, and a board certified behavior analyst can help build a plan when attempts keep stalling. Bring your tracking chart; the pattern of data is the most useful thing you can hand them.
Conclusion
Start by confirming readiness, not by picking a start date. Then build a bathroom routine your child can predict: same seat, same schedule, same visual steps, same reward, every day for weeks.
Progress across autistic children varies widely, and a slow month says something about the fit of the routine rather than about your child or your parenting. If you take one thing from this guide, make it the patience to wait for readiness. Everything else in the plan builds on it.